%20(1).png)
Back up database
Back up database
We strongly recommend that a maintenance plan creates database backups at regular intervals. Below you will find brief step-by-step instructions for manually backing up the database.
1. Start SQL Management Studio / log in to SQL Server
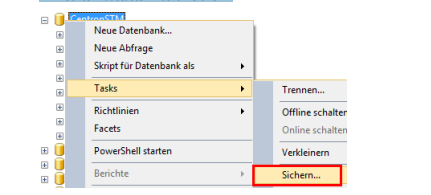
2. Select productive c-entron DB and
➔ Right mouse button > Tasks > Save...
3. Select backup set / add if necessary
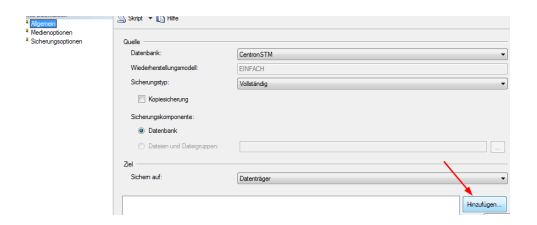
And specify the desired path + file name (with the extension .bak
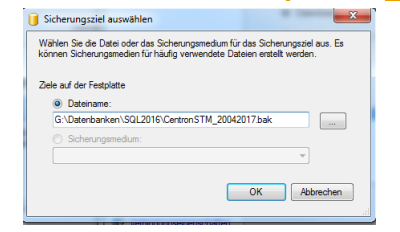
➔ Confirm dialog with OK
4. Perform backup (confirm the "Back up database" dialog with OK)
5. Depending on the size of the database, this process may take some time
The backup runs until the completion dialog appears:
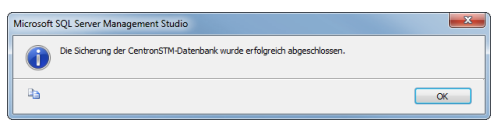
6. Confirm with OK
Restore database as test client
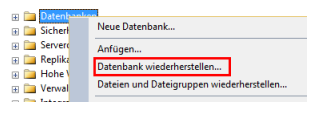
1. In the server overview, click on the "Databases" entry
➔ Right mouse button > "Restore database"
2. Set the source to "Medium."
3. Navigate to the file selection
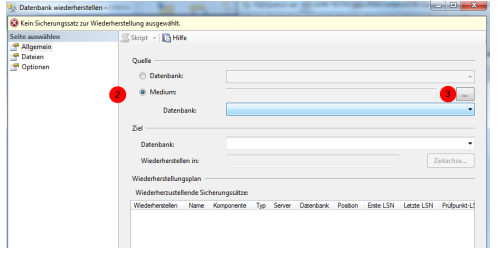
4. Select the file created in the "Back up database" step (or the backup created by the maintenance plan) and confirm with OK
If the backup record is intact, the view is updated and backup records are displayed.
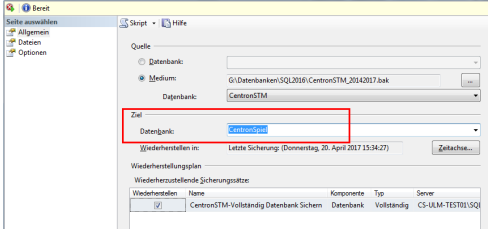
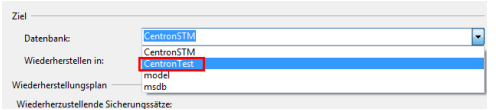
5. IMPORTANTrename the target database. The name can be chosen freely, but should be different from existing database names.
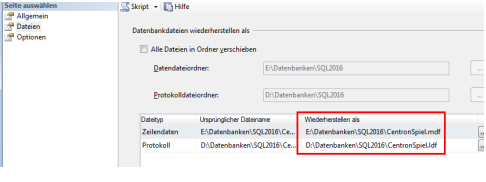
6. IMPORTANT: Click on "Files" in the left-hand menu and check the file names in the "Restore as" field. The file names should be different from existing file names and based on the newly assigned database name. If this is not the case, choose other file names that do not already exist, as otherwise they will be overwritten with the backup values, which may result in data loss
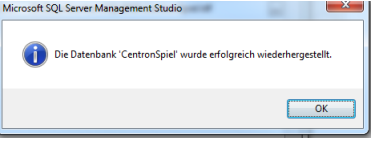
7. Confirm restoration by clicking "OK" (at the bottom of the dialog box)
8. After a short time, a progress bar will appear at the top of the screen:
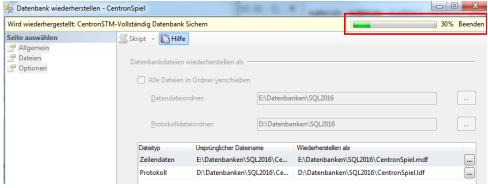
9. Do not close any windows before the completion dialog is displayed
Overwrite existing test databases
1. If a test database already exists and is to be overwritten with the current backup record, select the target database directly from the selection list after selecting the backup record (and do not assign a new database name)
2. Navigate to "Files" in the left-hand menu and check that the file name assignments in the "Restore as" field are correct > they should correspond to the selected target database.
3. Navigate to "Options" in the left-hand menu➔ Activate the "WITH REPLACE" option
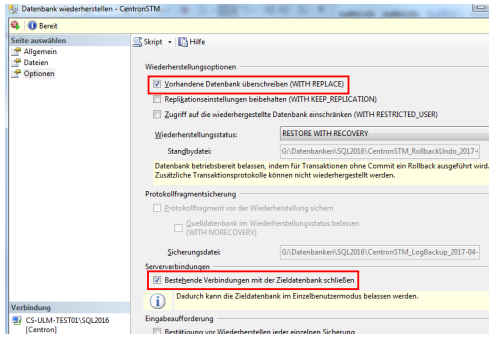
2. If possible, enable the option "Close existing connection to the target database."
3. Confirm restoration with "OK"