%20(1).png)
Campaigns
Campaigns
Campaign overview
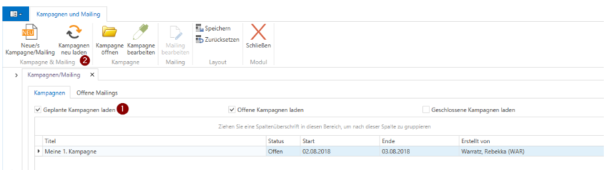
The filter options for the campaign list (1) are set to planned and open campaigns by default. After changing the filter, the list must be reloaded using the [Reload campaigns] button (2).
Create campaign
To create a new campaign, click the [New Campaign/Mailing] button, which will open this window:
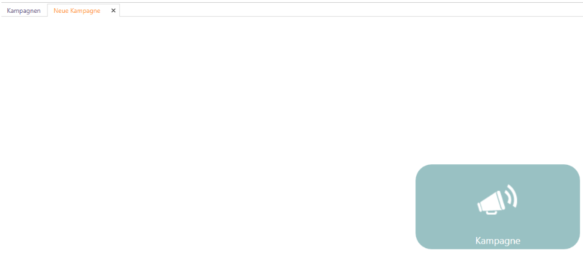
Click on the [Campaign] button here. This will open the "New Campaign" tab.
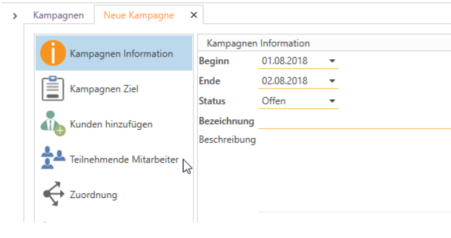
Campaign Information
Here you can enter the start and end dates, status, name, and description of the campaign (mandatory fields are underlined in orange). The status is currently only relevant for search purposes.
After entering the information, click [Continue] at the bottom right.
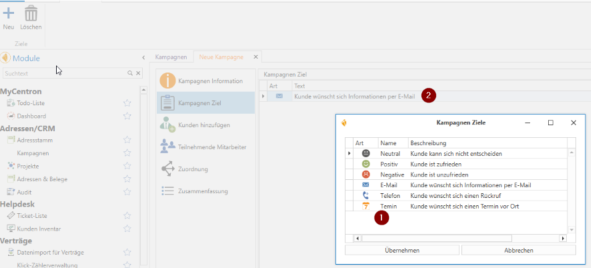
Campaign goal
To track conversations during the campaign phase, campaign goals can be added here using the [+ New] button (1), either several at once or selected and edited from those stored under Settings (2). The icons can also be used multiple times.
These goals can later be assigned at the contact and customer level in the campaign and changed as desired.
Add customers
To add a customer list to the campaign, click on Search (1), Saved Search (2), or Advanced Search (3) and select the data records for the campaign.
Right-clicking on a selected customer (4) opens the address master. Selected customers can also be removed from this window using the [Delete] key or the [Delete] button.

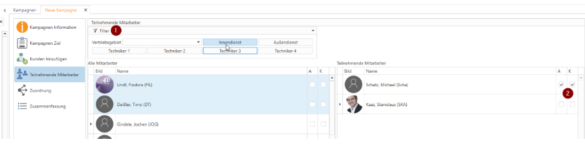
Participating employees
All employees are listed on the left, and those already assigned to the campaign are listed on the right. Employees can be easily added and/or removed using drag & drop. Using the filter (1), all customers are searched according to the selection and the corresponding employees are preselected; these can then be added simultaneously. It is also possible to grant an employee rights for admin and view all customers (2).
Starting with version 2.0.1807.28, admin rights are required to edit campaigns. If the right to view all customers has not been assigned, this employee can only see the customers assigned to them in the campaign.
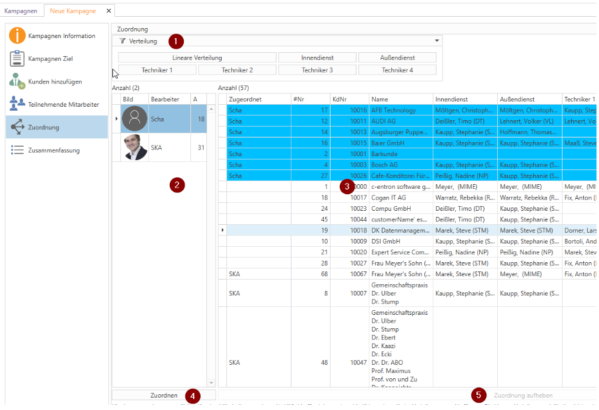
Assignment
In this section, you can assign employees to selected customers. Select an employee (2), then the customers to be assigned to them (3), and click the [Assign] button (4). The customers assigned to the employee are highlighted in blue.
Various automatic distribution options are also available here to assist you:
This can be done using the distribution buttons (1), which assign customers to their respective advisors. Alternatively, linear distribution can be used, which distributes all undistributed customers evenly among all employees. Since this affects all customers, this function should ideally be used as the last distribution option, as automatic distribution is no longer possible afterwards.
To remove the assignment, select the relevant customer(s) and click on [Remove assignment] (5).
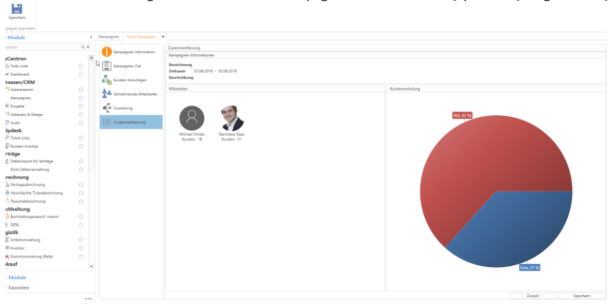
Summary
The summary provides an overview of the campaign and allows you to [Save]. You can [Save] at any time while entering the campaign details under Summary.
Open campaign

Once a customer has been selected, activities are created for the default contact person. Once a contact person has been selected, the activity is created for that person. The [Update] button is only for the campaign's own to-do list. [Excel Export] creates an .xlsx document similar to Delphi. [Complete Campaign] only changes the status. Documents refer to the campaign-wide document structure. Here, you can create a new folder via [New Folder] in the "Documents" tab and add a file to the respective folder with the [New File] button.
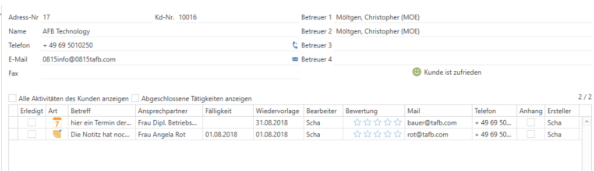
On the left, you can see the list of visible customers. All contacts assigned to the campaign are listed under Contacts. E is the decision that has been entered. M stands for marker, a mark that is only visible to yourself. Decisions and markers can be added and removed via the right-click menu.
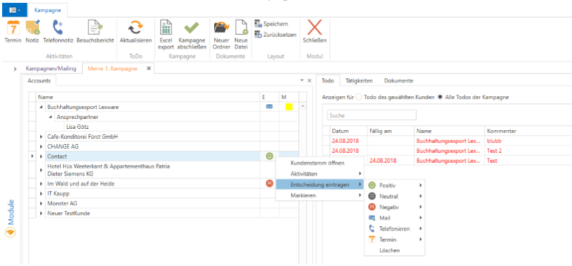
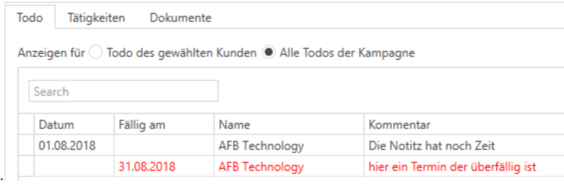
In the "Todo" tab, depending on the selection, you can view the individual to-dos for the entire campaign or only for the selected customer, not specifically for the currently logged-in employee.
The overview in the "Activities" tab changes depending on the selection. If a customer is selected, the customer information and all customer activities are displayed; if a contact person is selected, the contact person information and activities are displayed. By default, activities are filtered to the current campaign, but it is possible to display all activities here.