%20(1).png)
Flat-rate billing
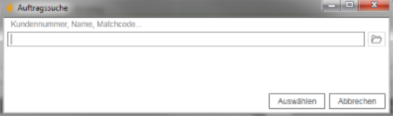
When you click on the "1. Select order" button (area 2), a search window opens.
First, a customer is searched for and selected in the search window.
After you have selected a customer, all open orders for that customer that contain flat-rate items are listed.
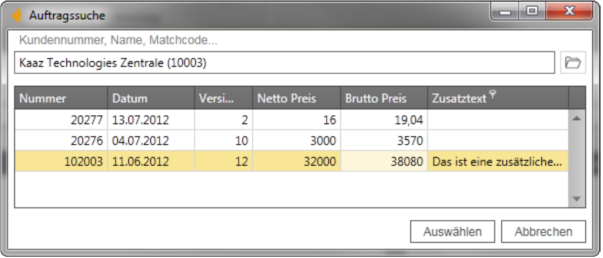
The "Select" button opens the order. You can cancel the order search by clicking the "Cancel" button.
Alternatively, you also have the option of searching for an order directly via the order search field (area 3).

This field supports various search techniques. If you leave the field blank and start the search, the search window will open as described in the quick start guide.
If you enter an order number in this field, the order will be loaded directly.
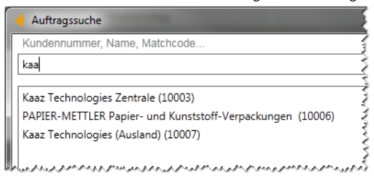
However, you can also enter letters here. When you start the search, the search window will open automatically and the search text will be filled in.
3.add 2 help desk hours to the order
Once the order has been loaded, helpdesk times can now be added. When you click on the "2. Select helpdesk (optional)" button (section 2), a small window appears listing all helpdesks belonging to the customer who owns the order.
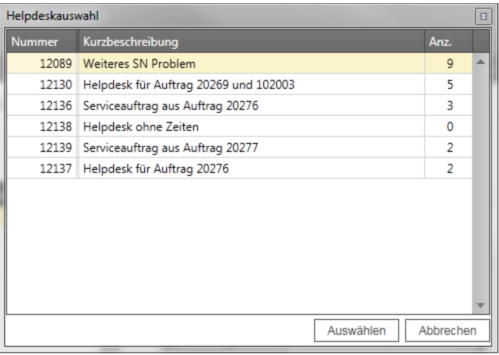
However, you also have the option of searching for a help desk directly via the search field (area 4). As with the order search, the help desk selection opens automatically if you leave the field blank. If you enter a help desk number, the help desk is loaded directly.
Help desks already assigned to the order are loaded directly when the order is opened.
Note: You can add further help desks to the module even after creating a new version using the search field (area 4).
3.3 Create new order version
To work with the order, you must create a new version of it. To do this, click on the "3. Create new version" button (area 2) or "New version" button (area 1).
3.4 Add/remove help desk times
First, a flat-rate item must be selected in the item table (area 4).
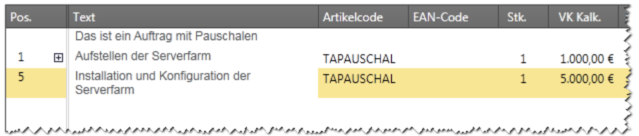
To make it easier to find the flat-rate items, you can also check the box next to "Show flat-rate items only" (section 4).
Then please select a helpdesk time that you would like to assign to the flat rate.
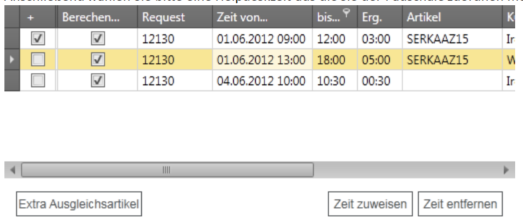
By clicking on "Assign time," the help desk time is automatically allocated to the flat rate.
Note: The check mark in front of the Heldpesk time indicates whether the time has already been assigned to a flat rate or not.
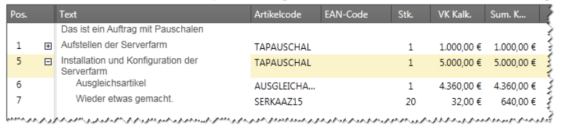
The flat rate is automatically converted into a bill of materials, and the help desk time is added to the bill of materials as a service item.
To ensure that the bill of materials amount remains at the flat rate, a balancing item is automatically added to offset the amount.
By clicking on "Extra compensation item" (section 4), you can also add your own service item with a fixed amount to a flat rate.
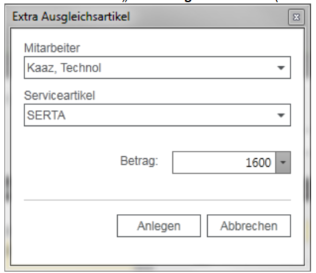
A window will open where you can select an employee and service item.
Then enter the amount and click on "Create." You can cancel the creation of an extra adjustment item by clicking on "Cancel."

The extra compensation item is added to the flat rate like help desk time.
If you want to remove the extra compensation item from the flat rate, please select the item and click on the "Delete" button.
If you want to remove help desk time from the flat rate, please select the help desk time and click on "Remove time" (section 4). The service item will then be automatically removed from the bill of materials and you can reassign the help desk time.
