%20(1).png)
Mailing - English
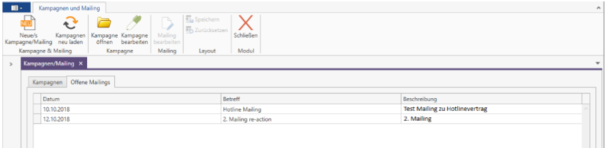
The mailing can be found under the menu item "Campaigns/Mailing" under "Addresses/CRM."
After opening, all campaigns/mailings carried out in c-entron.NET are displayed in individual tabs. You can filter using the columns.
By clicking the [New Campaign/Mailing] button, you can select a new campaign, a mailing, or a combination of both with Campaign & Mailing.
Data selection
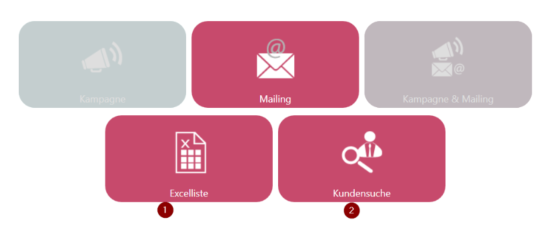
1. Excel list
The [Excel list] button can be used to select mailing participants from an Excel file. The Excel table must have headings for each column.
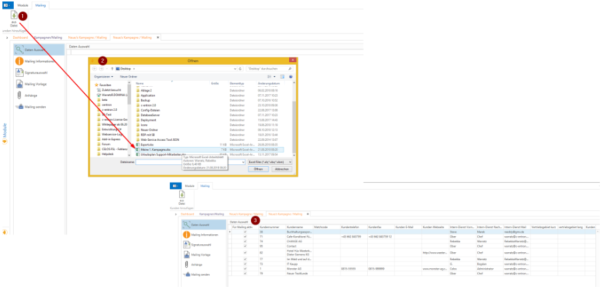
After clicking the [Excel list] button, the "New campaign/mailing" tab opens in the "Data selection" area. By clicking on [From file] (1), a previously saved Excel table (2) can be imported.
Important columns in the mailing table are usually:
- Contact email business
- Contact last name
- Standard form of address in letters
You can also create your own columns in the finished file (*.xls) (for example, the expiration date of a contract). However, the data for this must then be entered manually into the file.
This Excel table is then imported into the data selection with the predefined columns (3).
2. Customer search
Clicking on the [Advanced Search] button (1) opens a window in which several search criteria (no advertising block, standard addresses only, standard contacts only, mailing 1 and mailing 2) (2) are already predefined and can be selected and/or deselected. You also have the option of filtering by additional criteria in the filter area (3, 4).
The results are then listed via [Search] (5) and can be saved as a public or static search (7) via the [Save] button (6) so that they are available again for later emails/campaigns in the "Saved Searches" area.
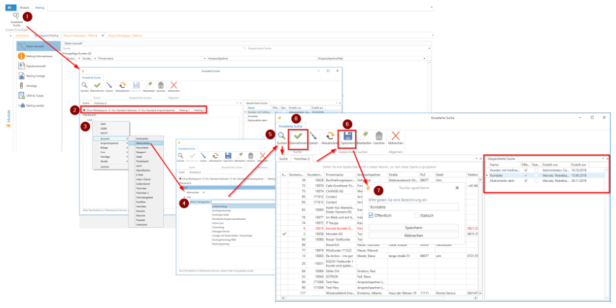
Clicking [Apply] transfers the selection to the Data Selection area.

Data selection
Here, the addresses can be filtered further and also deleted by selecting them and clicking the [Delete] button.
Clicking [Continue] opens "Mailing Information."
Mailing information
A description of the mailing created can be stored here.
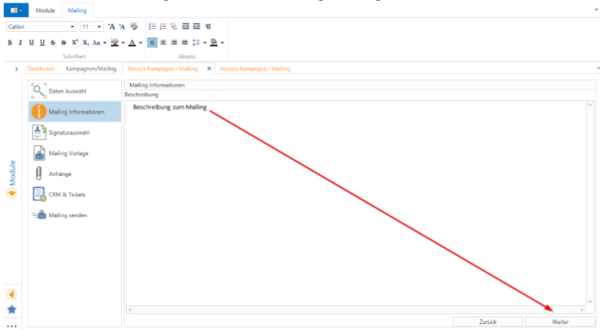
Then click [Next] again and the "Signature selection" area will open.
Signature selection
By selecting a signature, you can add a standard signature to the mailing. The signatures available here come directly from the client from which the mailing is to be executed.
The default path for Outlook signatures is as follows: C:\Users\{Windows/Domain User}\AppData\Roaming\Microsoft\Signatures
You can also select "Do not use signature."
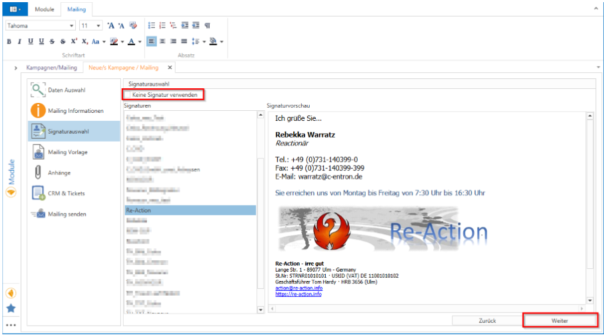
Click [Next] to open the next section, "Mailing Template."
Mailing template
The body of the email is displayed here and can be edited.
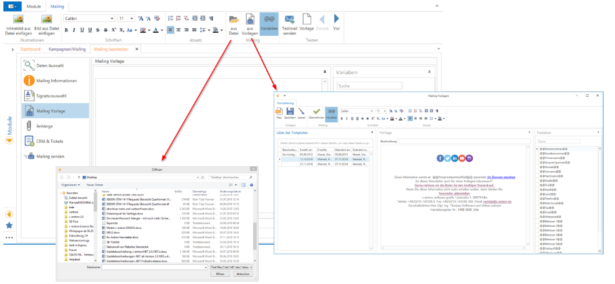
Here, a *.doc, *.rtf, or *.txt template for the mail body can be imported using the [From file] or [From templates] buttons.
The body of the mailing can be filled with predefined variables containing data from the source file, e.g., salutation and name, to make the mailing more personal. You define the variables directly in the body of the mailing.
ATTENTION: The variable must always begin and end with @@.
Pattern: @@{Free text}@@
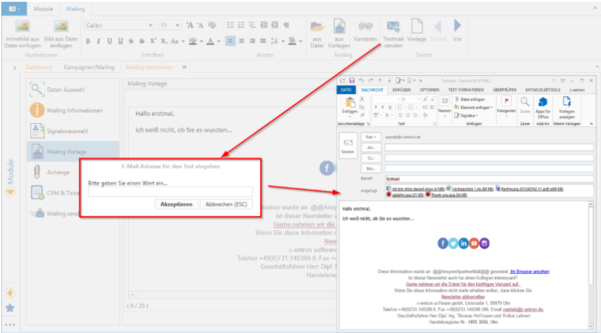
The [Template] button allows you to preview individual emails and make individual additions/adjustments. The [Template] button returns you to the original view.
We strongly recommend that you use the [Send test email] button to send a test email before sending the actual mailing in order to check the formatting, display, and file attachments once more before the actual mailing.
To do this, enter an email address for the test in the dialog box and send it by clicking [Accept].
Click [Next] to proceed to the "Attachments" section
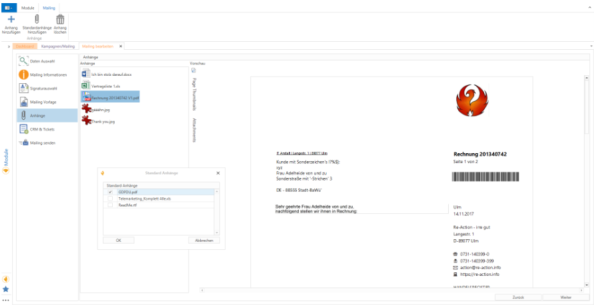
Appendices
Here you can manage file attachments for the mailing. Please pay attention to the size and total size of the attachments!
Clicking [Next] opens "CRM & Tickets."
CRM & Tickets
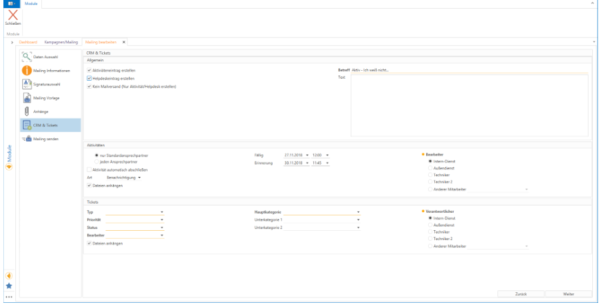
This dialog box allows you to set/create a ticket and/or a CRM entry for each email.
To do this, you must enter a subject in the top right-hand corner (which will then be used as a short description of the ticket or activity). The text of the description is optional.
If "Create activity entry" is selected, an editor must be specified to whom the activity is to be assigned.
If "Create help desk entry" has been selected, it is necessary to select the mandatory fields that are underlined in orange (in our example, type, priority, status, processor, main category, and person responsible).
If "No email dispatch (create activity/helpdesk only)" is also checked, the Send mailing area will be set to inactive after clicking [Continue].
If this has not been checked, this view will open.
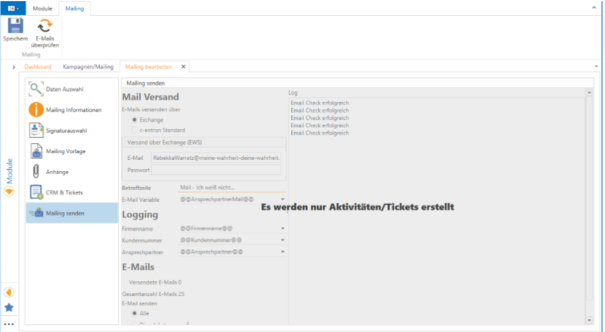
Send mailing
Under Mail Delivery, you can configure settings to determine whether mailings should be sent via Exchange or c-entron Standard. If Exchange is selected, the Exchange email address and corresponding password must be entered.
Furthermore, the subject line (underlined in orange) must be filled in as a mandatory field and the email variable must be selected.
The variables for company name, customer number, and contact person can also be stored for logging purposes. These are then filled in the log (on the right) with the entries from the data selection.
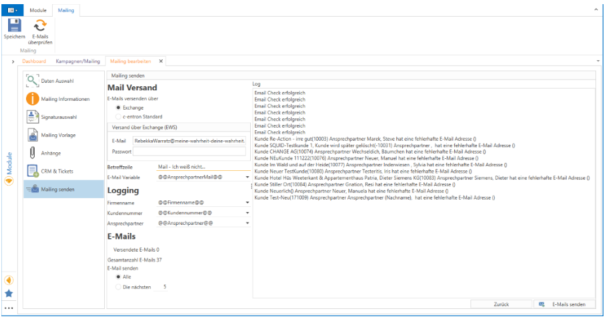
For emails, you can see how many emails have already been sent, the total number of emails, and you can choose whether all emails should be sent at once or just a certain number for now.
Please note: Sending a large mailing will take a correspondingly long time. During the sending process, the mail client should not be closed until the sending is complete.
The log on the right shows whether the email check was successful or whether something (e.g., the email address) is incorrect.