%20(1).png)
Receipt Guide
Table of Contents
1 Document entry 3
1.1 Head area 3
1.1.1 Document 3
1.1.2 Documents 4
1.1.3 Insert 4
1.1.4 Further processing 5
1.1.5 Extras 5
1.1.6 Layout 6
1.1.7 Administration 6
1.1.8 Reports 6
1.1.9 Module 7
1.2 Customer area 7
1.3 Document area 7
1.4 Position range 8
1.4.1 Receipt details 14
1.4.2 Calculation 15
1.4.3 Address 15
1.4.4 Files 16
1.4.5 Commission 17
1.4.6 Logs 17
1.4.7 Devices 17
1.4.8 Document history 18
1.5 Information area 19
Document entry
How are the receipts structured?
All receipts have the same structure and are divided into 5 different sections
Head area
Customer area
Document area
Position range
Information area
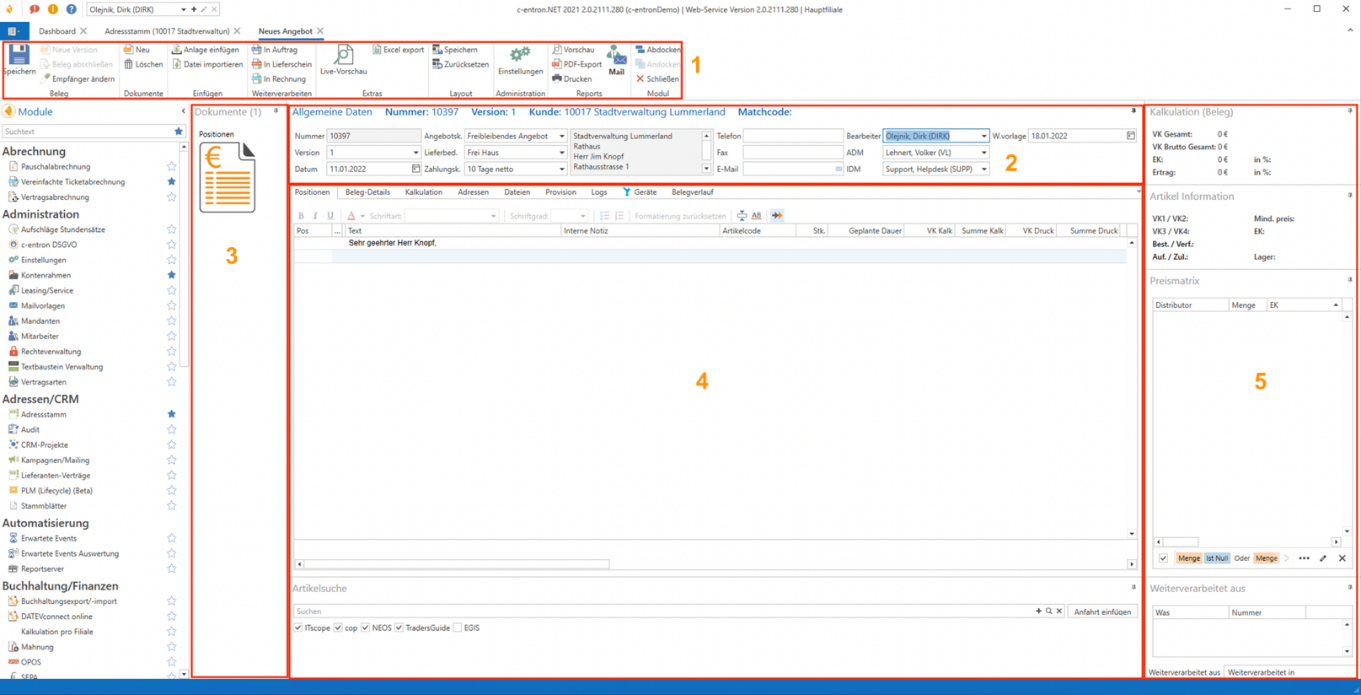
0.1 Head area
All information relating to the corresponding document is located in the header area.

0.1.1 Receipt
Here, the document can be saved, a new version can be created, offers can be closed, and the recipient can be changed in general.
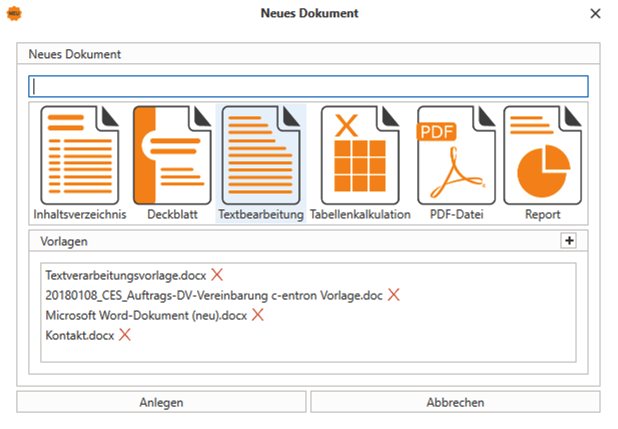
0.1.2 Documents
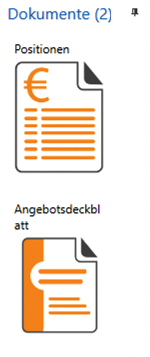
Here, documents from a selection (see screenshot) can be added to the document. Practical examples include product data sheets, a cover sheet from your own company, or terms and conditions.
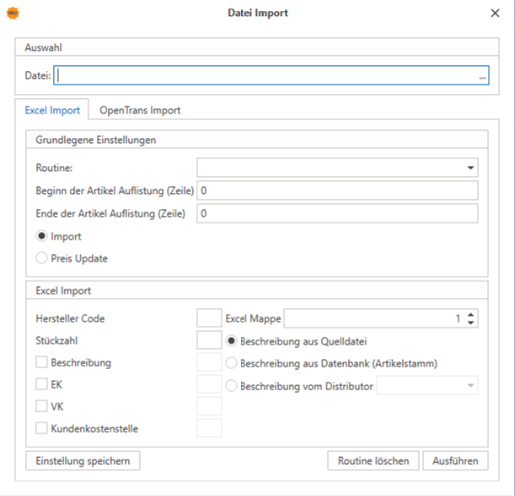
0.1.3 Insert
Excel or OpenTrans files can be imported here via "Import data."
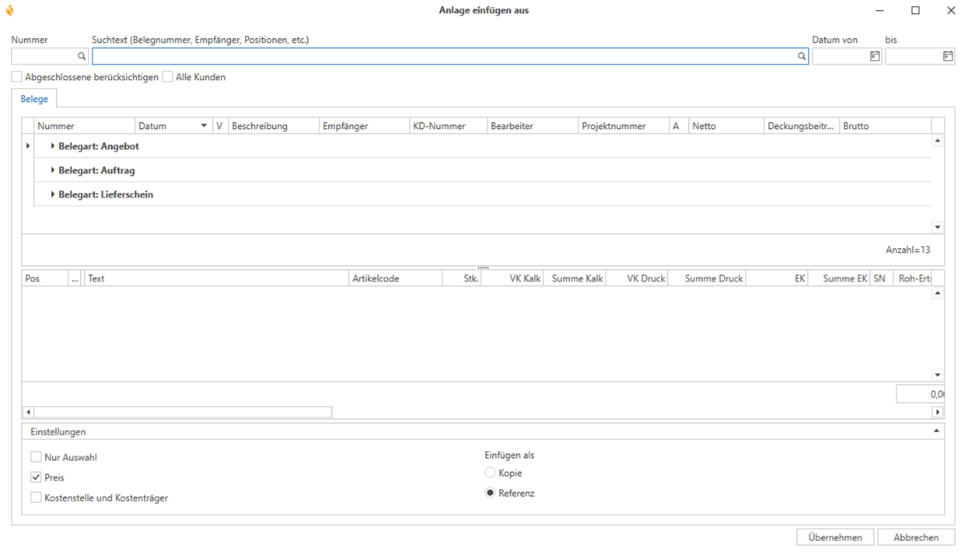
Using "Insert attachment," information can be transferred to the document from another document, such as a delivery note or invoice.
Either just a selection of items or the entire document, as a reference with reference to the original document or as a copy.
0.1.4 Further processing
Documents can be further processed in the next document. For example, quotes can be further processed into an order. In this case, the quote is closed because it has been transferred to the order.
Logical sequence
Quote -> Order -> Delivery note -> Invoice
Of course, an offer can also be processed directly into a delivery note, or an invoice can be created directly for customer X.
0.1.5 Extras
The live preview allows you to view the document as it would appear if you were to print or email it now.
The live preview can be "refreshed now" or paused; by default, it refreshes automatically every 10 seconds.
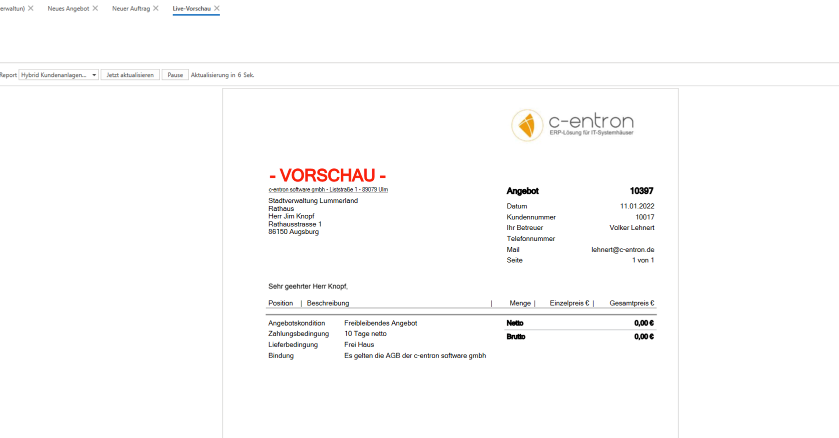
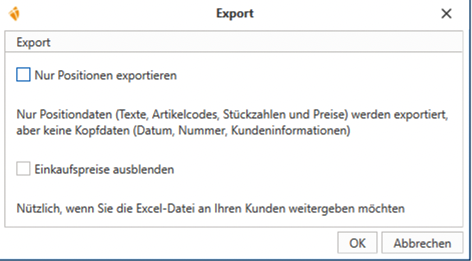
Furthermore, the document can be exported to an Excel file.
The tabs "Open BVL," "Analysis," and "Contract Articles" are still available in the order.
Opening BVL opens the order proposal list – here, the items required for the order can be entered as an order.
Analysis opens the flat-rate billing – here, under "Service flat rates," you can then evaluate whether the flat rate applied is positive or negative in comparison to the technician time used.
Contract articles can be stored directly in a contract with the customer, or the quantity in the contract can be increased.
0.1.6 Layout
Each module has its own layout, which can be customized/moved and saved for each module. Columns can also be shown or hidden.
0.1.7 Administration
The Administration tab takes you directly to the settings for the module. To view or change the settings, you need administration rights within c-entron.
0.1.8 Reports
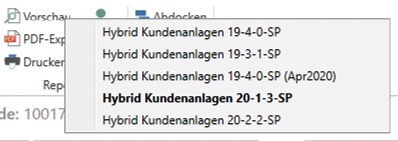
Documents can be previewed, exported as PDF files, printed, or sent by email. If you have saved multiple reports, you can select the relevant report by right-clicking on it. The default report is highlighted in bold and is selected by default.
0.1.9 Module
Here, the module can be "undocked" and moved to a second screen, for example.
Clicking "Close" closes the offer, for example. If the document has not yet been saved, a corresponding message appears.
0.2 Customer area
All relevant data relating to the customer and the document can be viewed in the customer area.
Customer information and customer number, document number, version, date, document conditions, telephone number and email address, as well as the person processing the document, the sales representative responsible for the document, and the resubmission date.

0.3 Document area
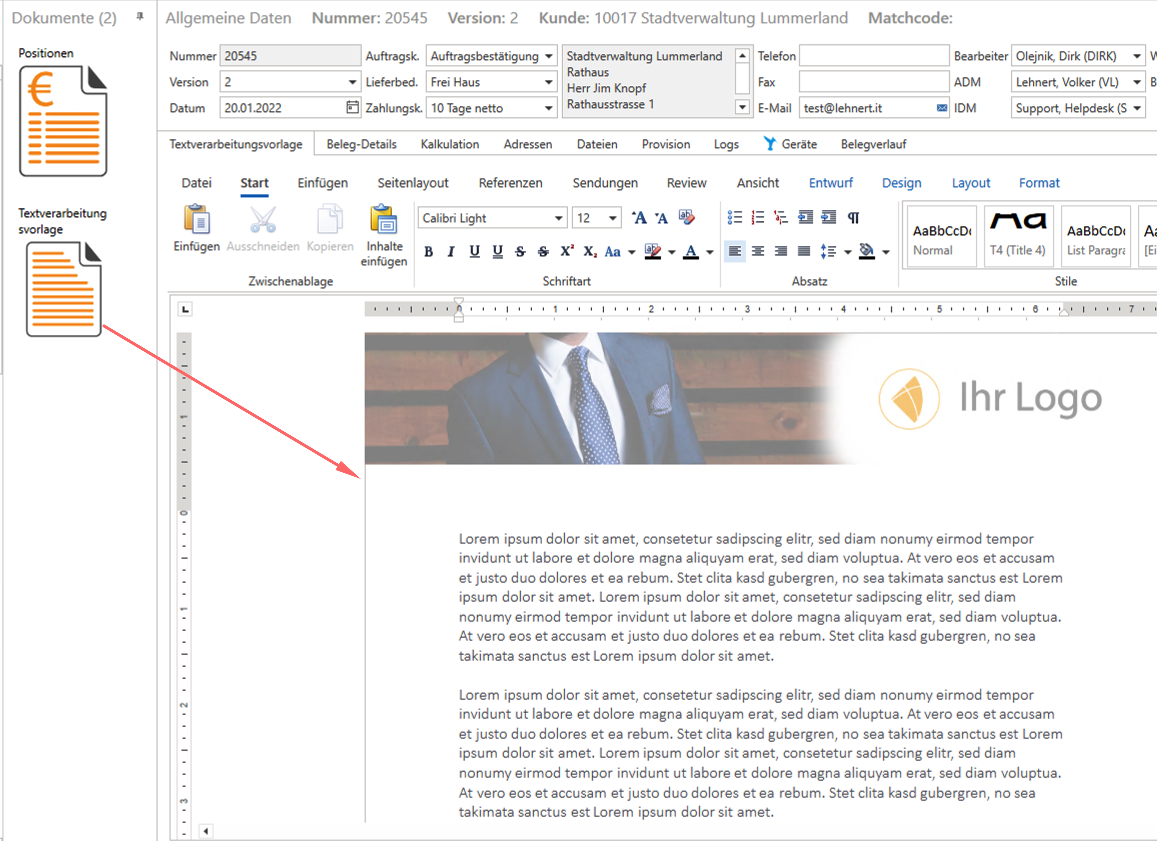
The documents for this receipt are displayed in the document area. Here, you can insert a Word, Excel, or PDF file using drag & drop, for example, or alternatively select a file from the header area under "Documents." The files can be rearranged using the left mouse button under Documents.
You can also add to or change inserted documents, such as Word files, using the "Editor view." To do this, simply select the document.
0.4 Position range
There are nine tabs in the item area (Item, Document Details, Calculation, Address, Files, Commission, Logs, Devices, and Document History). The "Items" tab displays the documents with the different items/positions.
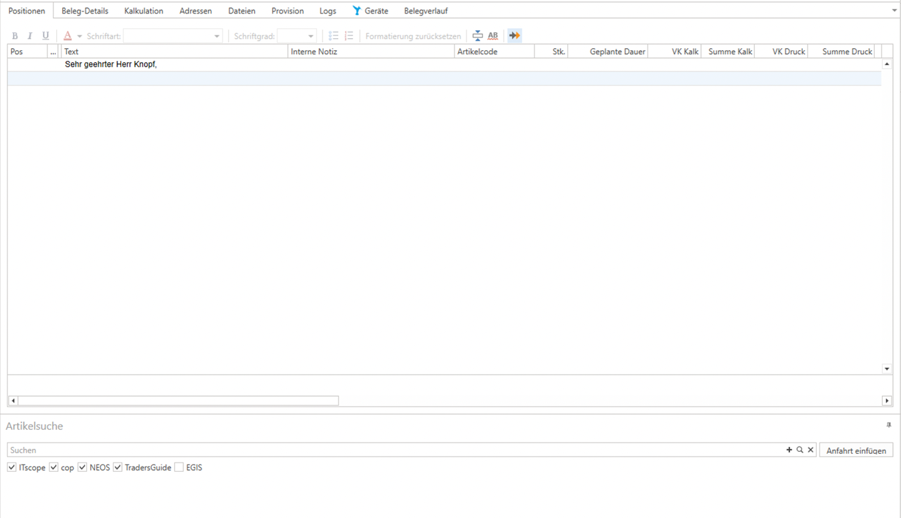
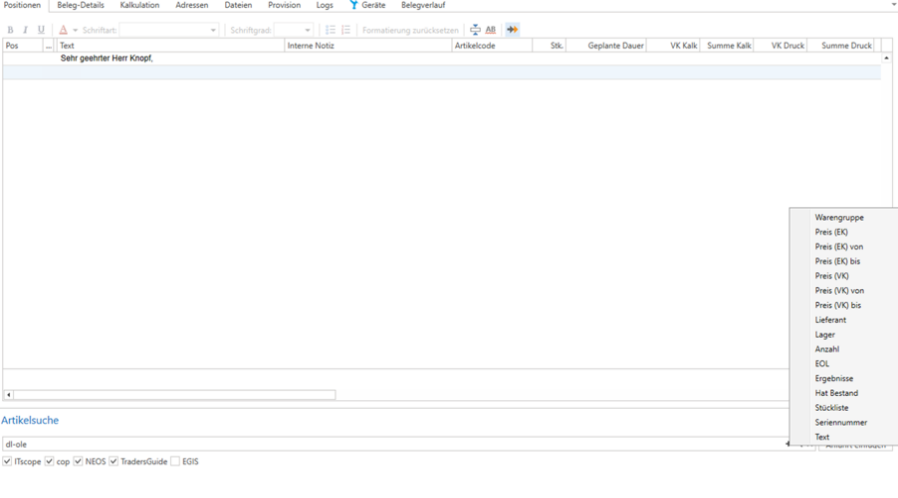
The article search is located at the bottom of the page. Here, you can set filters for the article search using the + sign on the right-hand side.
The Directions tab allows you to insert the customer's stored directions (must be maintained in the address master under Addresses).
If you have maintained the accesses for live article queries in the settings, these will be listed under the article search (ITscope, cop, NEOS, TradersGuide, EGIS)
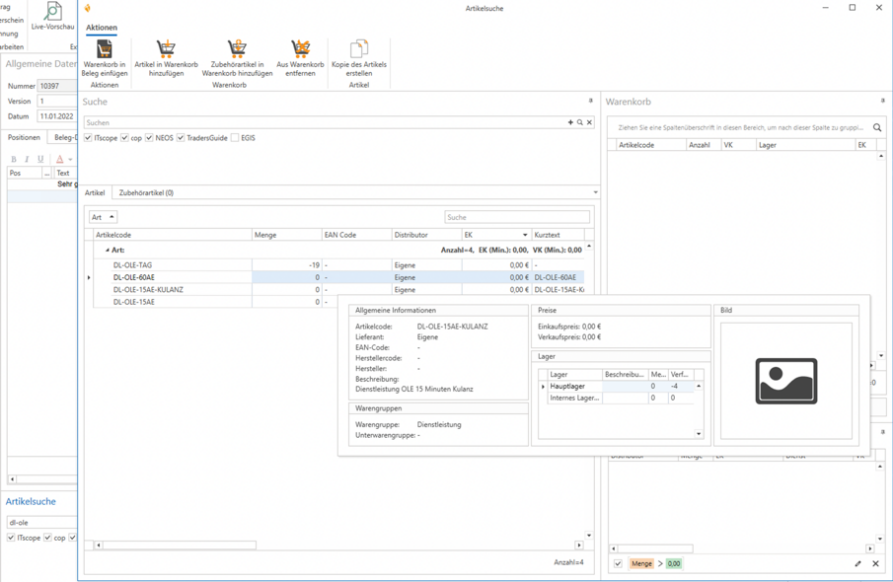
As soon as the item search displays a result, you can hover your mouse over the item to see more details.
Double-click on an item or click the "Add item to shopping cart" button to place this item in the shopping cart at the top right.
Now you can search for other items, for example.
Some suppliers have stored accessories for live queries. For example, if you search for an HP printer, toner, fuser units, paper trays, etc. are listed as accessories.
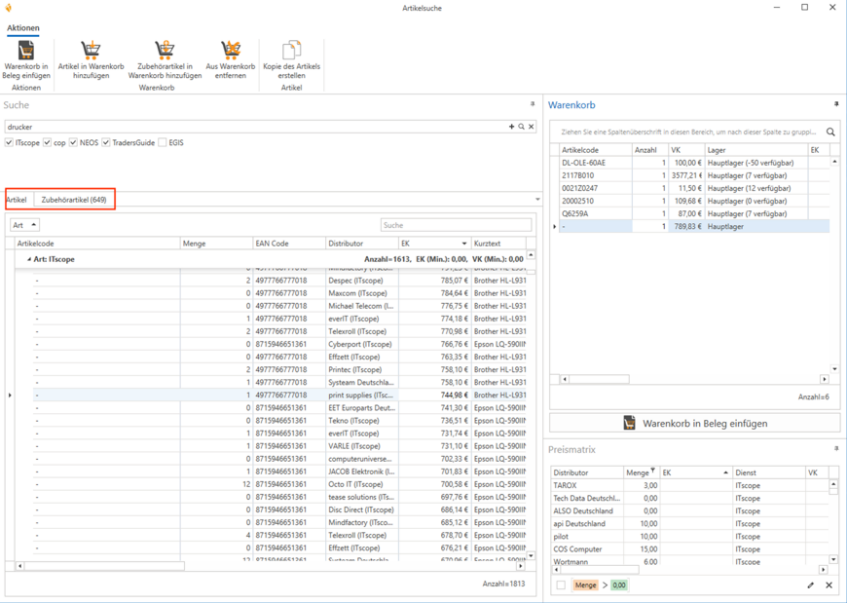
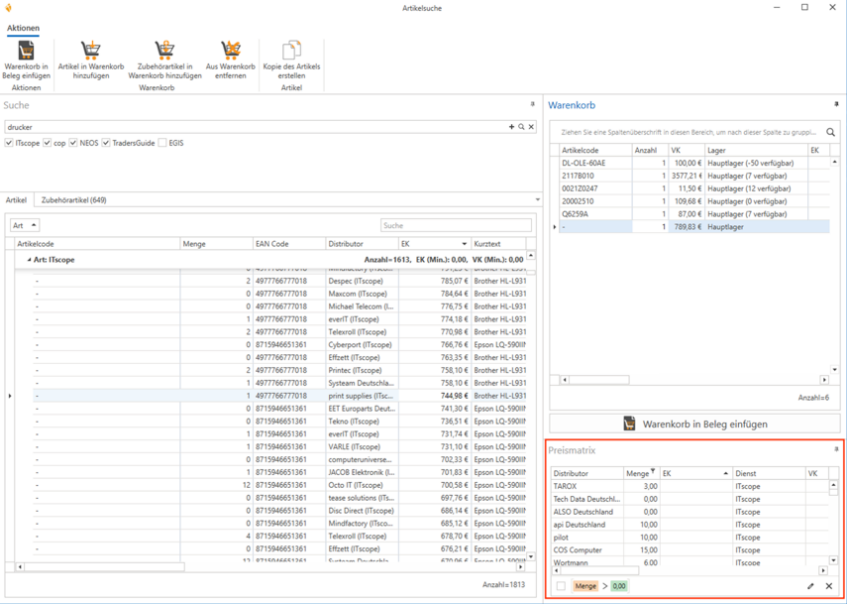
As soon as you select an item and that item has the correct manufacturer code stored, the price matrix will display the availability and purchase prices, etc. for the suppliers.
Once all items are in the shopping cart, click the "Add shopping cart to receipt" button to return to the receipt.
In the Positions tab, you will find a context menu (right-click on a position) with the corresponding abbreviations behind it.
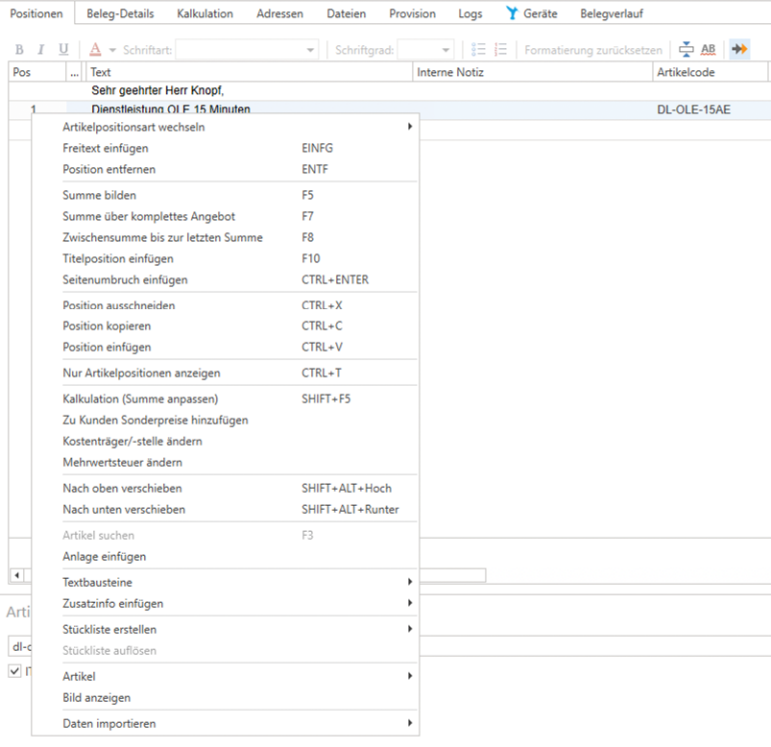
Change item position type
Here you can choose between several types of items, e.g., alternative, optional, as needed, etc.
Insert free text
Inserts a new empty position. Text, such as information, can also be written in this position.
Add up
Multiple items can be selected in the document and a total can be calculated based on this selection. This total can also be calculated (right-click on the total)
Total for entire offer
Sums up all items in the document and lists them at item level
Subtotal up to the final total
To create a subtotal, it is important to place the cursor in an empty row.
Insert title position
Title positions are inserted directly above the selected position. Title positions can be expanded or collapsed depending on how you want the printout to look.
If you use the word "monthly" or "annually" in the title position, the totals will be split at the end of the document.
e.g., in investment and monthly costs and annual costs.
Insert page break
Makes a break; all positions after that are displayed on another page.
Cut position
Cuts out the selected position.
Copy position
Copies the selected position.
Insert position
Inserts the position from the clipboard.
Show item positions only
Only displays the item positions; free texts, etc. are hidden
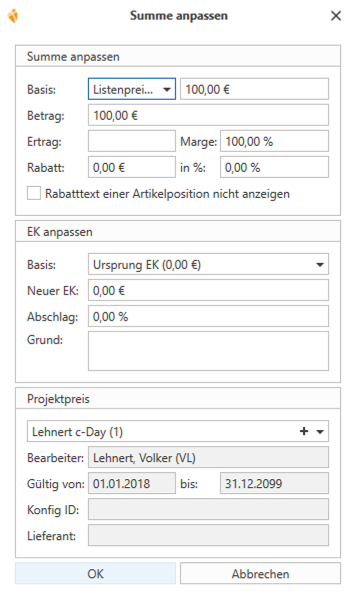
Calculation (adjust total)
You can calculate each individual item position. To do this, right-click on a single position and then select "Adjust calculation."
The calculations for the sales price can be adjusted in the upper section, and those for the purchase price in the lower section.
New project prices can be added under Project Prices, or existing ones can be selected.
Add special prices for customers
Adds the selected item with the price from the document to the customer as a special price in the address master.
Change cost unit/cost center
Here you can select a cost object and the respective cost center for each item
Change value added tax
VAT rates can also be changed per item, e.g., 7% rate for books.
This can also be specified in the article.
Move up
Moves the selected position up
Move down
Moves the selected position down
Search for articles
If you enter the item code or a description in a free text field in the position, you can then search for it in the item master
Insert attachment
Here you can copy attachments (documents) or insert existing attachments into an attachment, either completely or as individual items
Text modules
Here, stored text modules can be inserted into the document as free text.
Insert additional information
Here, items from the distribution or your own accessories can be selected and inserted.
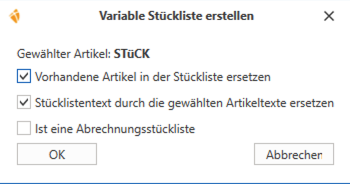
Create bill of materials
You have the option of creating variable parts lists. Select multiple items and then choose "Create parts list" -> Search for parts list header.
The article search will then display all filtered parts lists (you have already stored a parts list from c-entron that can be used)
Leave the first check mark active, then the items will be transferred to a parts list.
Activate Replace bill of materials text with selected article texts if the texts of the individual items are to be transferred to the bill of materials header.
Explode bill of materials
Expands the bill of materials, making the items directly visible again.
Article
Here you can jump directly to the item management of the selected item, upload images for this document, or load the history of the item.
Show image
If an image is stored in the article master, it can be displayed in the document at the article level.
Import data
Images, descriptions, details, etc. from ITsope, Icecat, cop, EGIS, NEOS, and Tradersguide can be displayed here. An active account with the suppliers must be registered.
0.4.1 Receipt details
Various information can be stored in the document details.
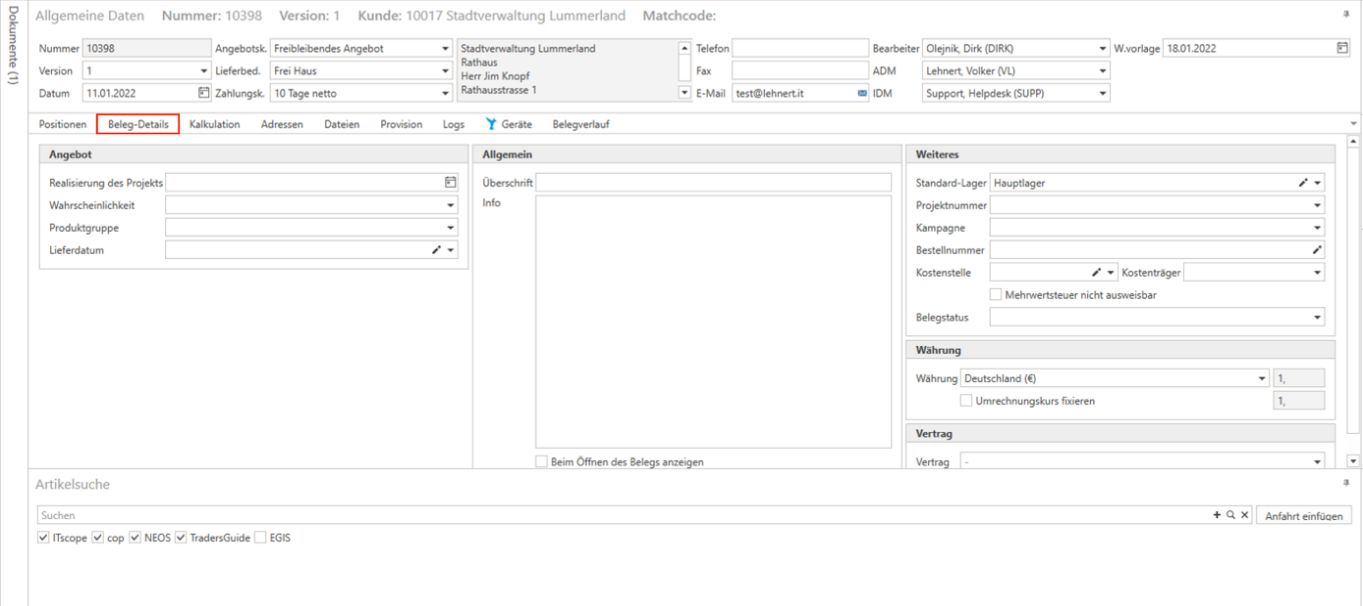
Offer
When is the project scheduled to be implemented, with what probability, product group, and delivery date?
General
General
Here you can enter a heading for the document and information about the document. The information can be displayed directly when the document is opened by selecting the "Show when opening document" checkbox.
More
Here, you can store or select the standard warehouse, project number, campaign, order number, cost center and cost unit, non-reportable VAT, and document status at the document level.
Currency
A different currency can be stored and this can also be fixed using the "Fix conversion rate" checkbox. The conversion rate then remains the same for the document, even if it is adjusted in c-entron.
Contract
A customer contract can be stored at document level here. This then applies to all items in the document, provided that the items are only added after the contract has been stored at document level.
0.4.2 Calculation
Here you can see a complete overview of the calculation of the product groups, sales, earnings, EK price, etc. for the document.

By selecting the checkboxes for leasing and/or service, you can include the corresponding terms and conditions on the document.
The values for leasing and service must be stored in the Leasing/Service module.
0.4.3 Address
Under Addresses, you can enter a different delivery address, billing address, or licensee address for the document. "Search for address"
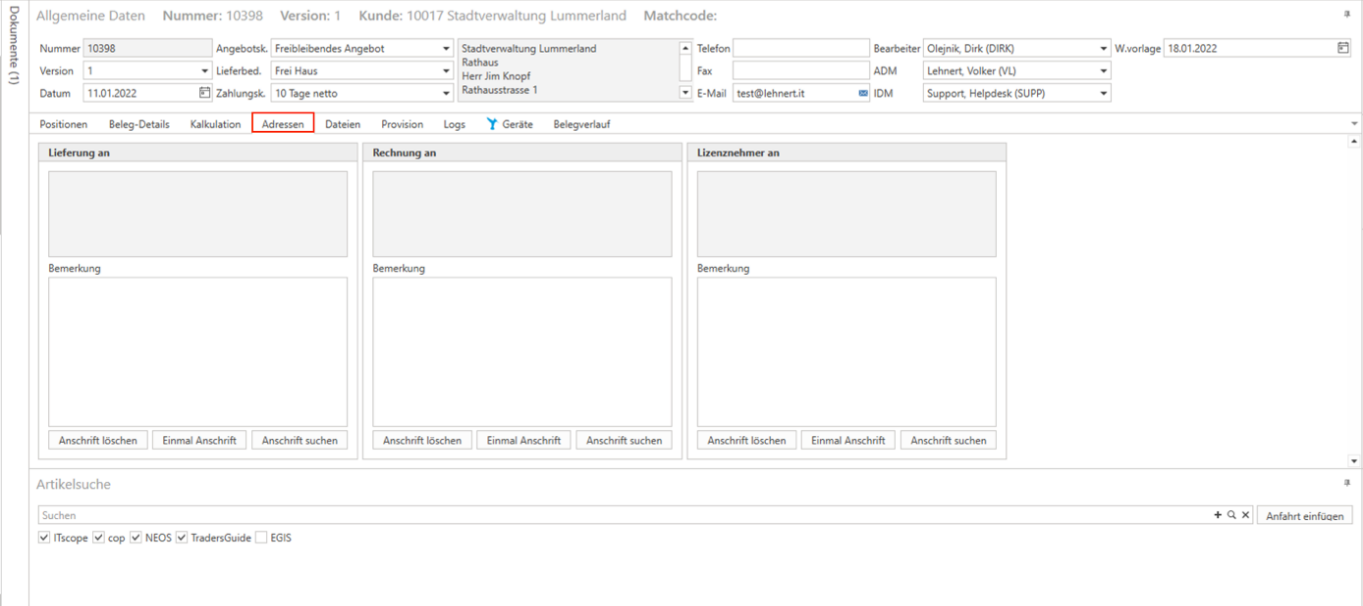
The delivery address is then transferred to the delivery note, and the billing address is transferred when the invoice is created. A license may be required for the order from the supplier so that the license is issued to the customer and not to the person placing the order.
The "One-time address" button can be used to enter an address that is not stored in the address master, e.g., the address of an employee working from home if the laptop is to be sent there.
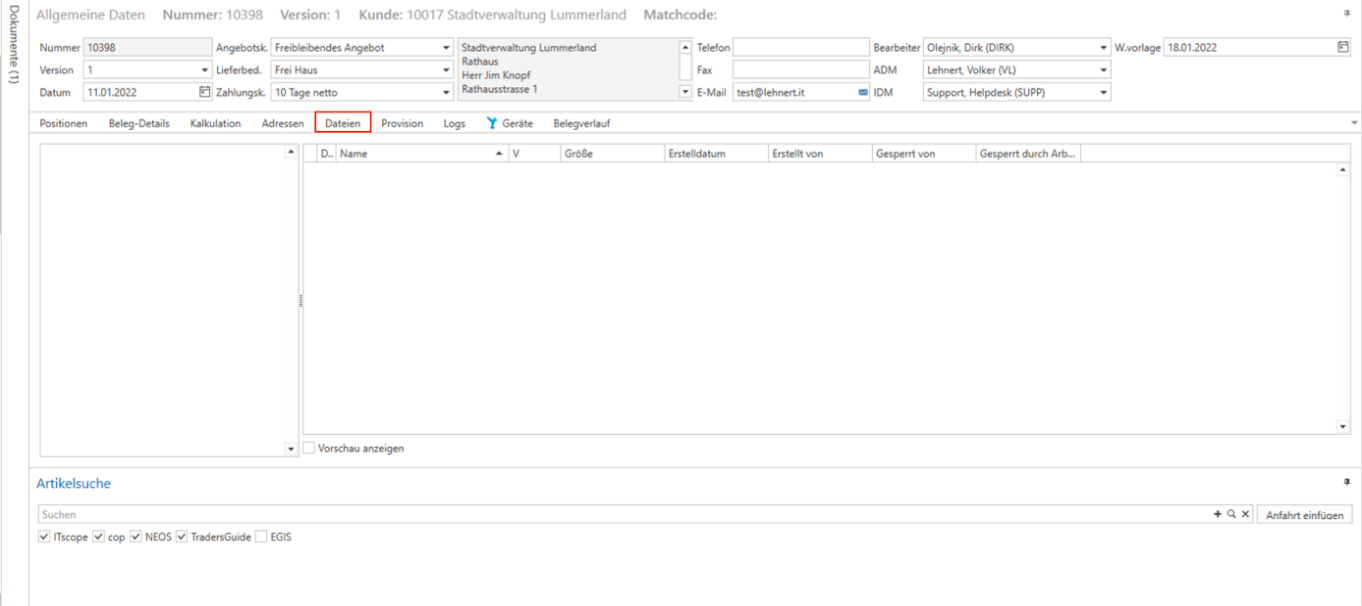
0.4.4 Files
All files, such as emails with the customer, PDF files of the supplier's offer, manuals, etc., can be stored under the Files tab. These can also be found in the address master under Documents with the corresponding document number.
When a document is emailed, printed, or exported as a PDF, it is also stored here below the files.
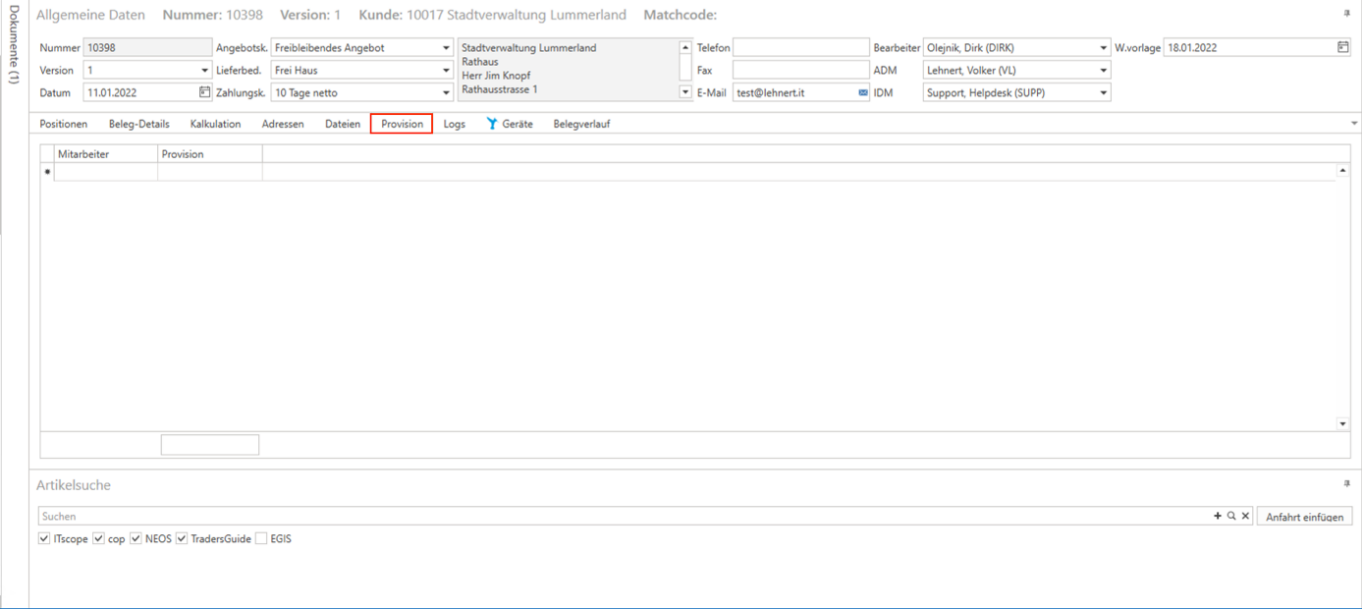
0.4.5 Commission
Here you can store the employees who are involved in this "project" and receive commission for it.
Important: The total must always be 100%.
e.g.
Employee A 60% and Employee B 40%,
or employee C 100%.
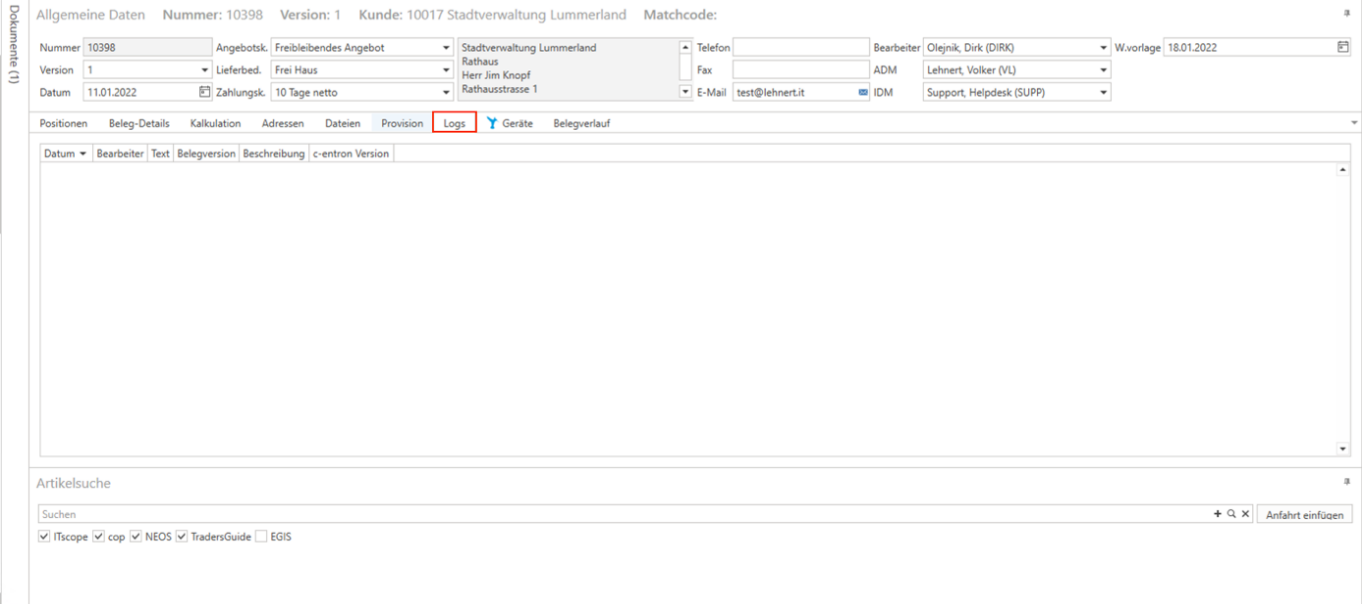
0.4.6 Logs
All changes to the document are logged under the Logs tab.
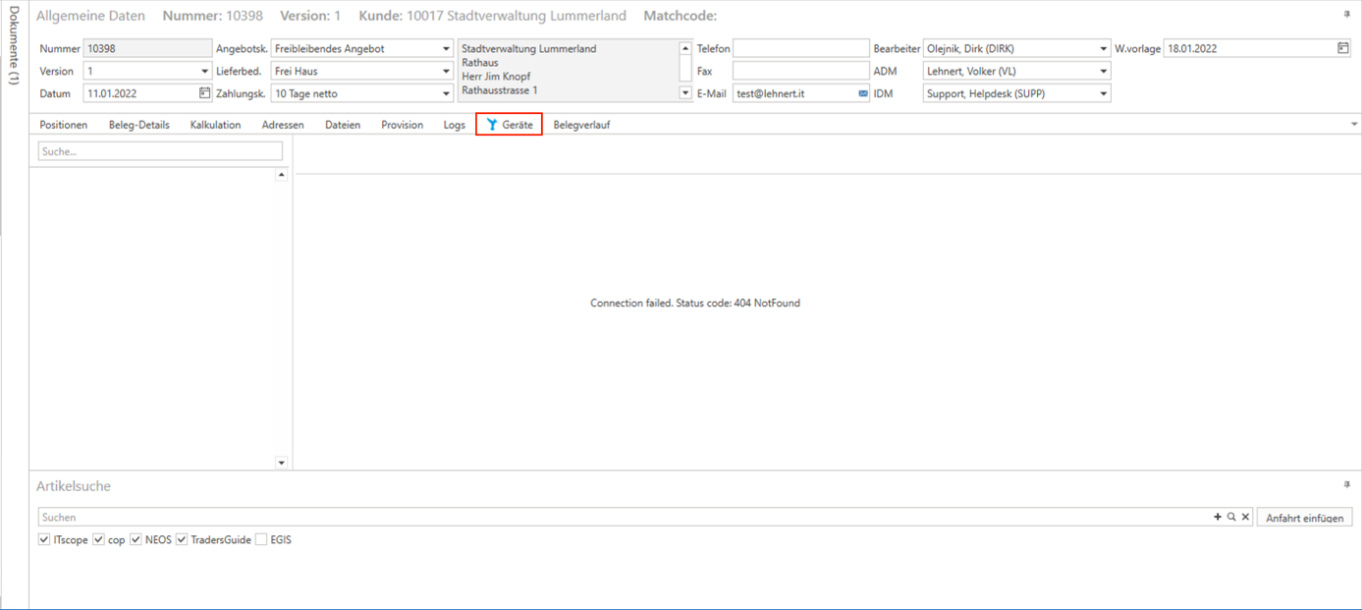
0.4.7 Devices
Once Riversuite is installed and inventory management is active for the customer, the customer's devices are displayed here and can then be linked to the document.
0.4.8 Document history
An overview of the documents is displayed in the document history.
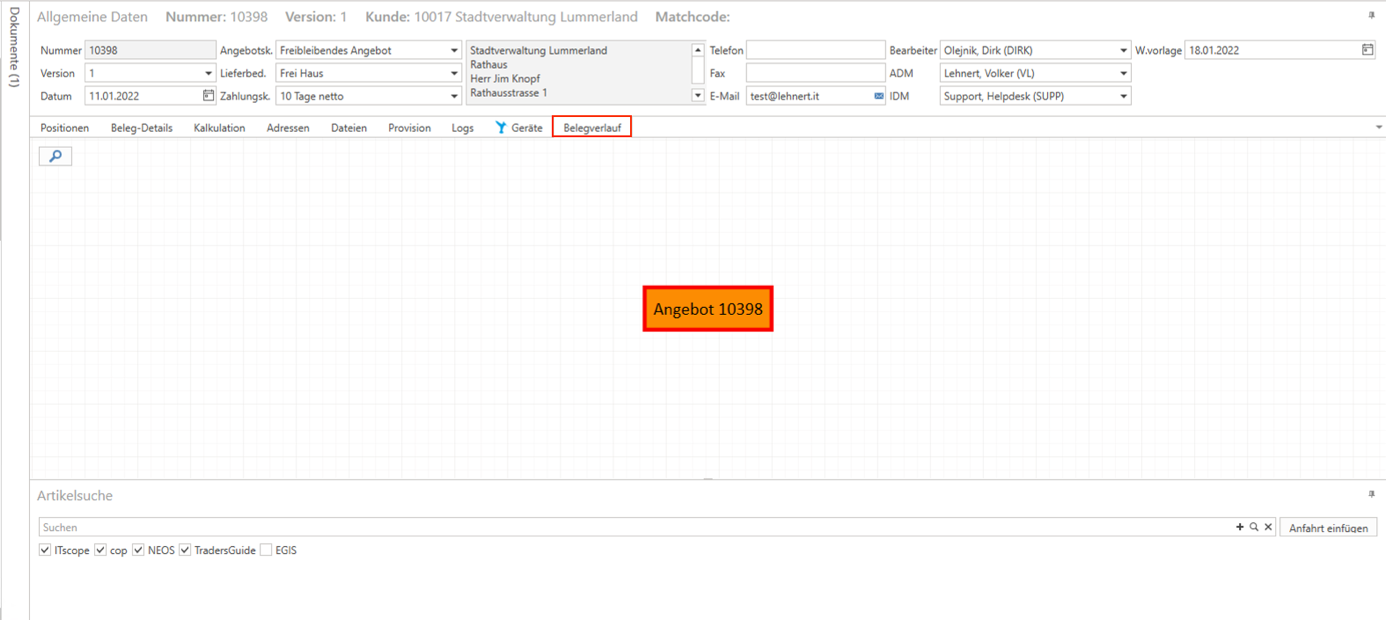
In the document history, you can open the corresponding document by double-clicking on it. When the document is selected, you will see an overview of the items, description, etc.
0.5 Information area
The information area is divided into calculation (document), article information, price matrix, and further processed from/to
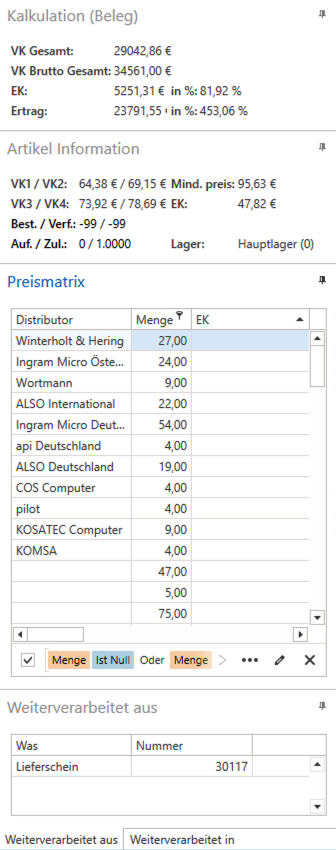
Calculation (document)
The entire document shows the cost price, purchase price, and profit
Article Information
The retail price, wholesale price, and availability or stock level of the selected item or position are displayed here.
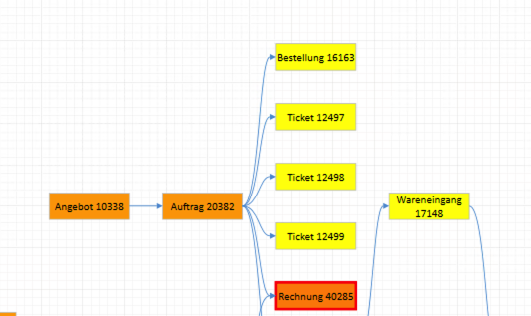
Further processed from / in
The display of which documents were used and which documents were further processed, in this example from a delivery note to an invoice.
If you click on the delivery note, for example, the items in the document that come from the delivery note are highlighted.