Set up and use the finAPI interface in c-entron.NET
The finAPI GmbH is one of the BaFin-certified financial services provider, which handles legally secure and technically standardized communication with banks.
By integrating finAPI into c-entron.NET you can reliably and securely access and process bank details via an encrypted cloud environment. The connection is made using the highest security standards—you always retain control over your bank details.
requirements
version
c-entron.NET / WebService from version 2.0.2502.433
license
valid Online banking FinAPI license
(NOTE: You can view which licenses you are using in c-entron under the orange (i) Info icon in the top left corner under the "Licenses" tab or Global Settings – Administration – System – c-entron Licenses or in the c-entron Connection Manager by clicking on [Show licenses] or in c-entron under Global Settings.)
Step by step: Setting up the finAPI interface
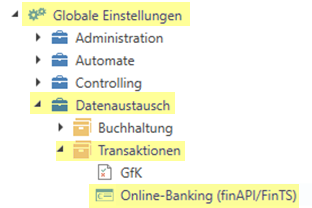
Open the section Settings → Data exchange → Transactions → Online banking.
Click on "New"to create a new interface – the "Create new online banking interface" dialog box/window opens.
Forgive one meaningful designation and Description.
Select at "Type" the type via the drop-down menu "finAPI interface".
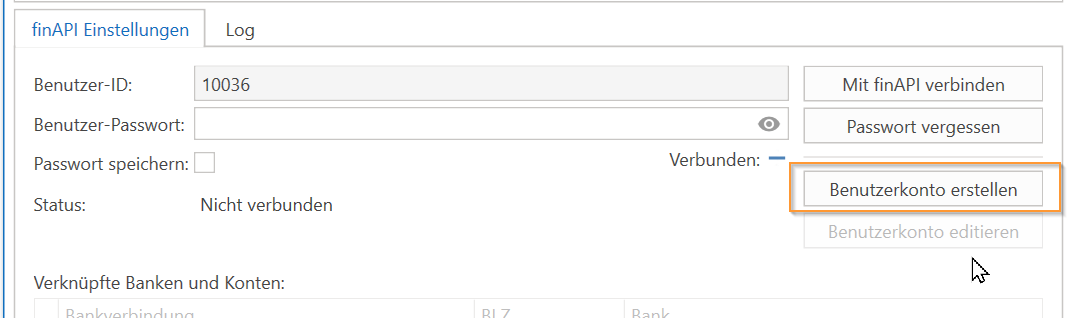
Create an account with finAPI when you use it for the first time. Enter a secure password here, which you will need for the interface.
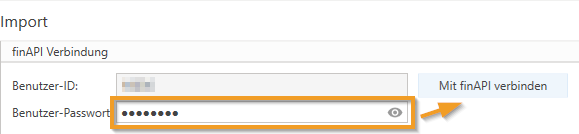
Under the "finAPI Settings" tab, enter the following in the field password the assigned password.
(You can view the password you entered by clicking on the eye icon.)
(If errors occur during connection, you can view them in the "Log" tab). After successfully logging in, a green check mark should appear next to the Connected status.
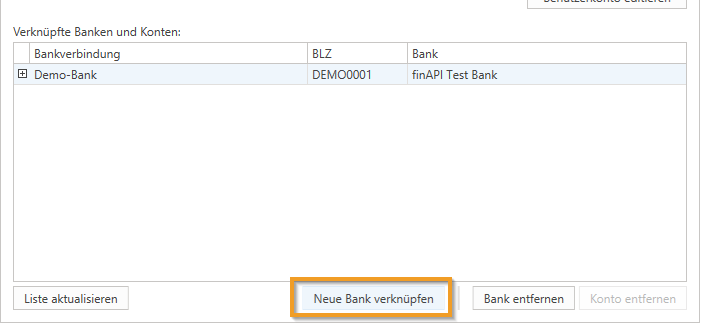
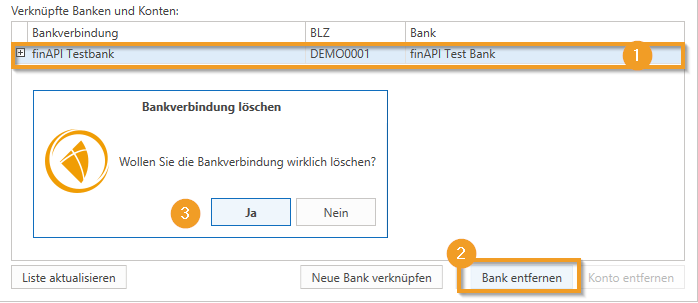
To link your bank account to your finAPI customer account, now press the "Link new bank" button in the lower area.
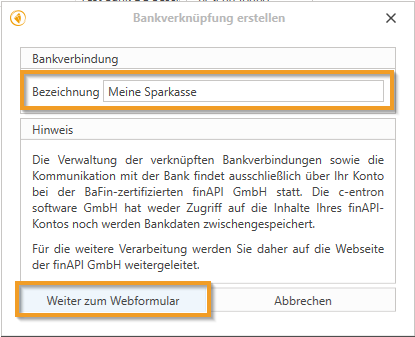
In the following dialog, you assign a Names for the bank account (e.g., "My Savings Bank" or "finAPI Test Bank").
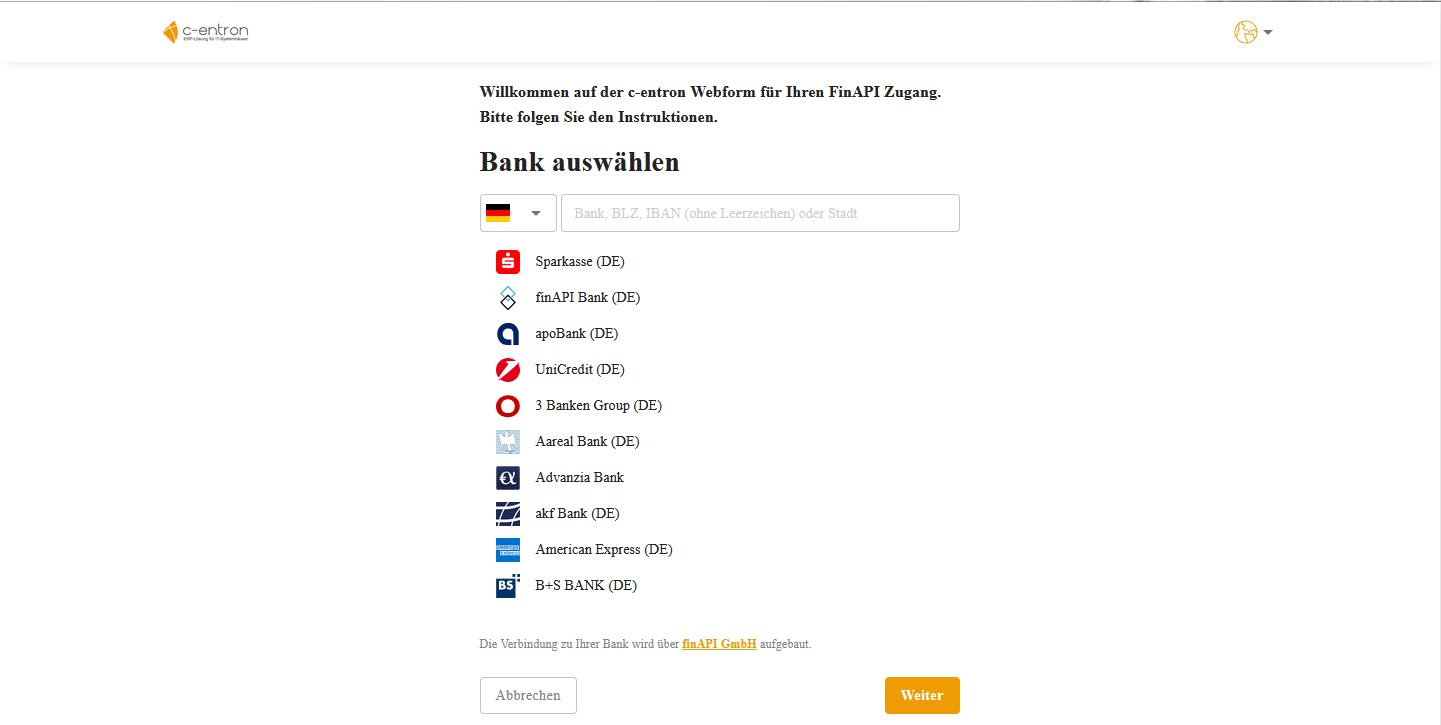
Click on "Continue to the web form". You will now be redirected to the finAPI website.
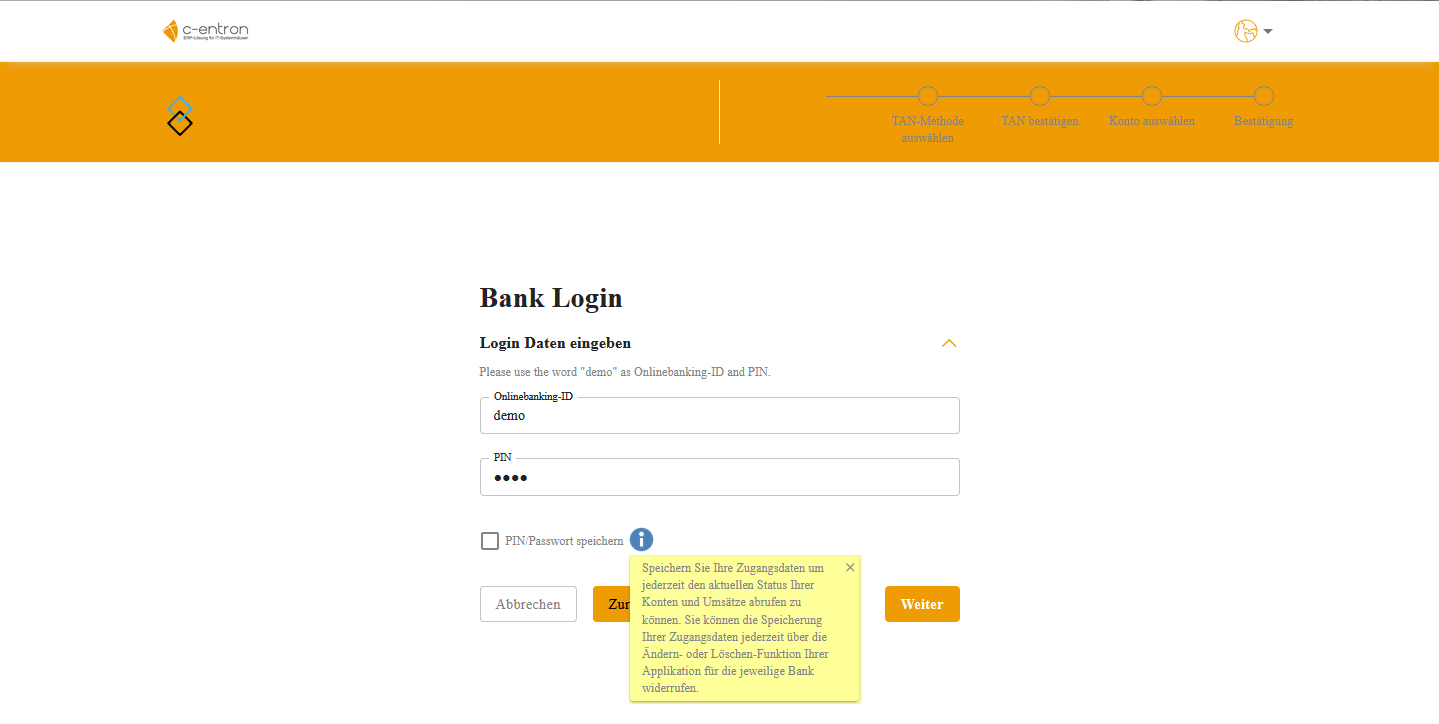
Find your bank and sign up there. You have a choice here:
Save PIN: FinAPl saves the password/PIN and can now repeatedly retrieve bank statements for the next 180 days. After that, the PIN must be renewed.
Do not save PIN: Bank statements can only be downloaded once and cannot be retrieved again, as FinAPl does not have a PIN/password for a new retrieval (e.g. for tomorrow).
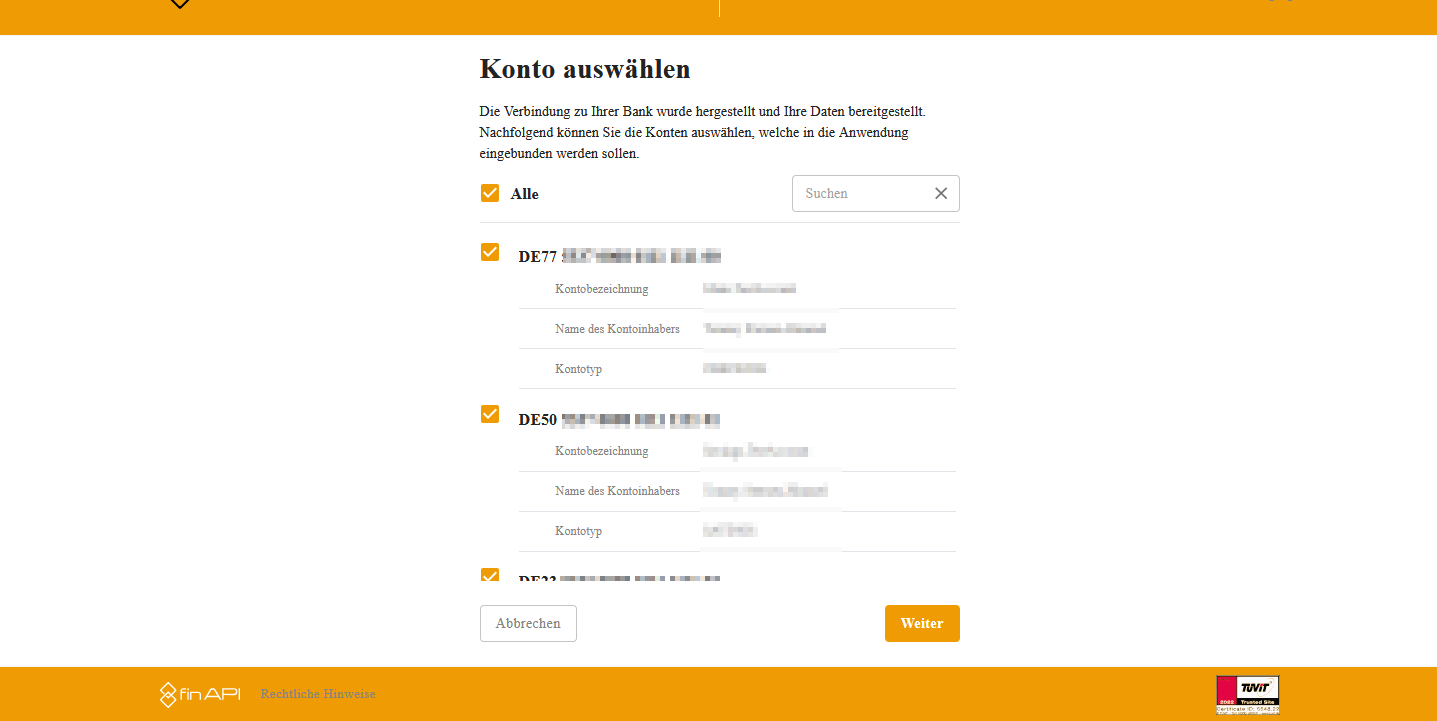
If you have multiple accounts with your bank, you can select the accounts you want to include in the application.
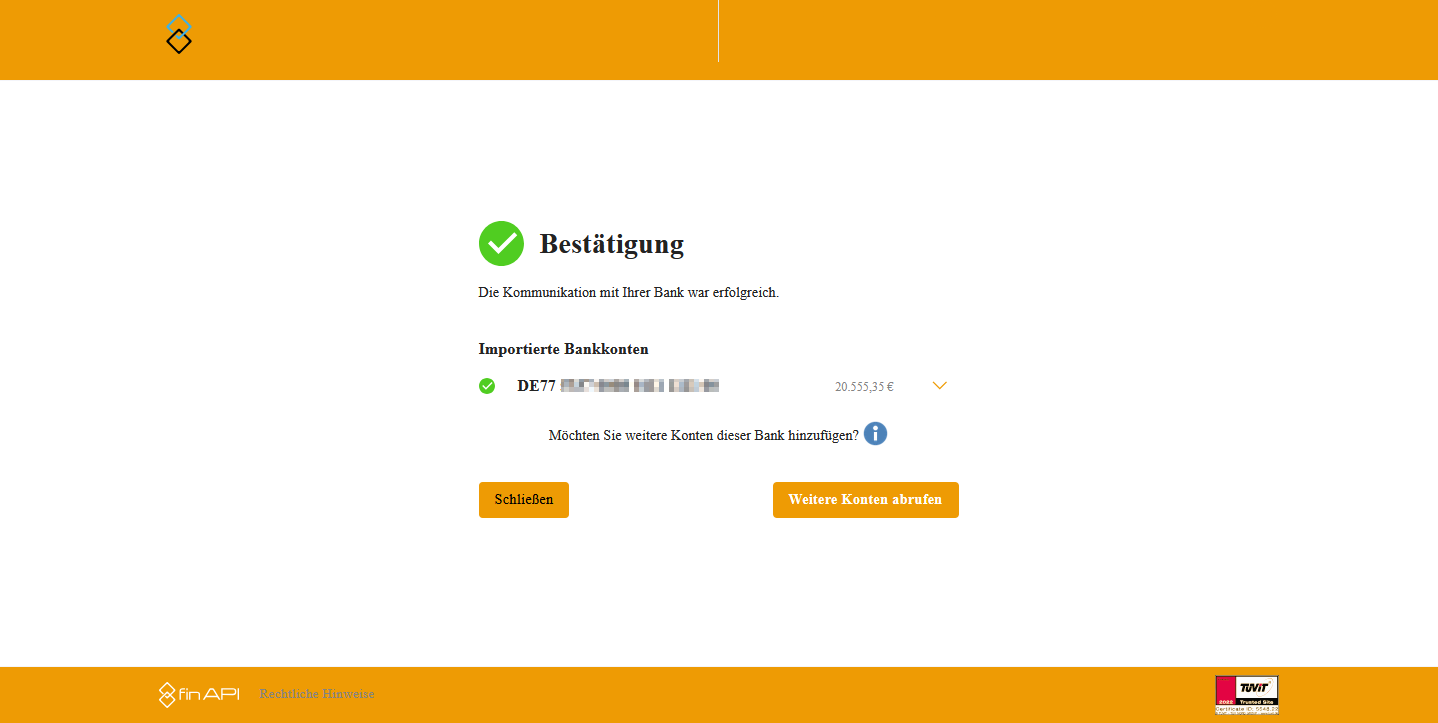
If communication with your bank is successful, you will receive the following information:
Once you have completed the process, you can close the web form. Then click on the "Refresh list" button.
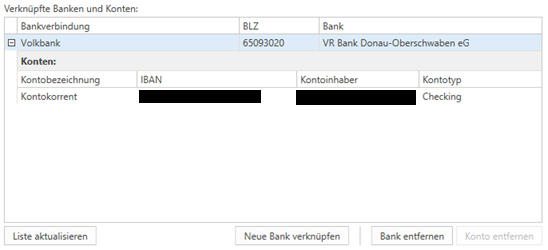
Your bank and the corresponding account should now appear in the list of bank details.
You have now successfully completed the configuration. Now click on the "Confirm" buttonto complete the configuration. Then click on the Save ribbon button.
Retrieve bank statements (in the incoming payments module))
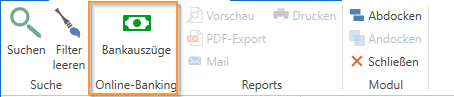
Open the module "Payment received" and click on the button "Bank statements".
To access your bank statements via finAPI, click on the Ribbon button "Get Data".
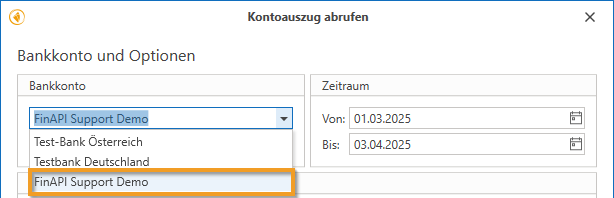
In the following dialog, first select your newly created interface under Bank Account and optionally set a time frame for data retrieval.
A login area for your finAPI customer account will now appear under "Import." Enter your password (if not assigned automatically) and press the button. "Connect with finAPI".
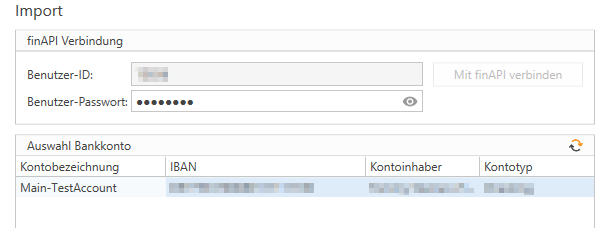
When you connect to finAPI, a list of all linked accounts is automatically loaded. Now select the account for which you want to retrieve bank statements.
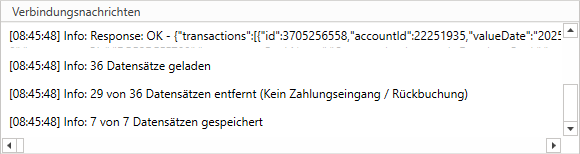
Click on the button "Retrieve data" to start retrieving the data. The bank statements will now be loaded. Note: Only incoming payments, i.e. positive amounts, are imported.
If the import was successful, a corresponding message appears in the "Connection messages" message window.
You can now close the dialog box by clicking the "Close" button.
The new data is now available to you in the tab. "Bank statements" available.
Assigning incoming payments to invoices in c-entron
Now, imported incoming payments can be conveniently assigned to the corresponding invoices in centron be assigned. The assignment can be automatically or manually – both options are explained below.
1. Relevant fields of a transaction
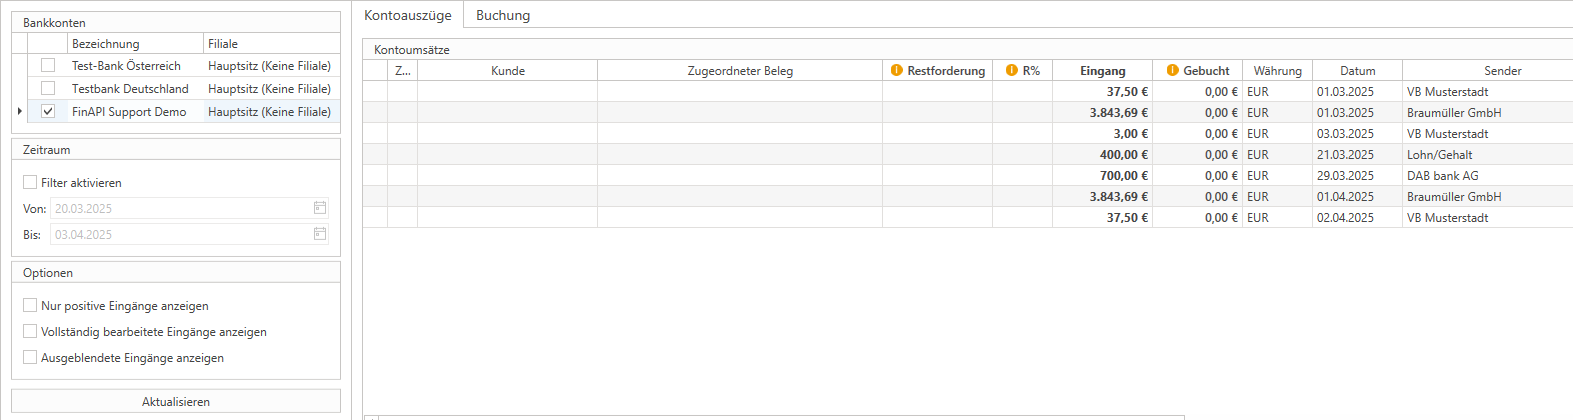
The following information is important for correct allocation in the transaction:
payment receipt: The amount of the payment received.
BookedThe amount that has already been assigned to an invoice and posted.
broadcaster: Name of the account holder from whom the payment originates.
International Bank Account Number: Sender's bank account details.
intended use: The text specified by the customer when making the transfer (e.g., invoice number).
For a automatic assignment it is essential that:
The amount of the invoice matches the payment received.
The invoice number is correctly stated in the purpose of payment.
The customer name matches the specified sender name.
The IBAN on file matches that of the sender.
If this information is correct, the assignment can be made without manual intervention.
2. Automatic assignment
For automatic assignment, click on "assign automatically"After confirmation, the system automatically searches for matching customers and open invoices.
You will then receive an overview of the matches found:
The customer is identified by their name and IBAN.
The appropriate invoice is assigned based on the amount and purpose.
The assigned amount is displayed.
This feature enables fast and reliable processing of incoming payments.
3. Manual assignment
If automatic allocation is not possible—e.g., due to a missing invoice number or differing account details—the allocation can be done manually:
Select transaction and with right-click Open the context menu.
About "Search for customers" manually select the appropriate customer.
Then about "Search for receipt" Select the corresponding open invoice.
The selected assignments are summarized below.
If a payment received exceeds or falls short of the invoice amount, the system can recognize this. It is possible to:
Assign multiple invoices to a single payment receipt.
Remove any documents that are not relevant.
Adjust allocations at any time.
Posting incoming payments
Once the assignment has been completed, the payment can be transferred to the posting area:
About the rider "Booking" you will receive an overview of the assigned documents.
The view can be grouped by customer or displayed as a list.
With "Start booking" the payments are finally allocated to the invoices and posted.
After booking, the receipt appears in the account statement overview. marked in green with one check mark under "booked."
One click on "Open document" enables direct access to the invoice. In the document details You will see that the outstanding amount has now been cleared.
ImportantIf the entire amount for a transaction has been posted, it will be "fully processed" and no longer appears in the transaction list by default. This ensures that the user only sees transactions (incoming items) that still need to be processed. The user can also choose to display these transactions again by selecting the "Show completely processed incoming items" option.
%20(1).png)