%20(1).png)
Simplified ticket billing
Simply bill predictable times in a targeted manner with simplified ticket billing.
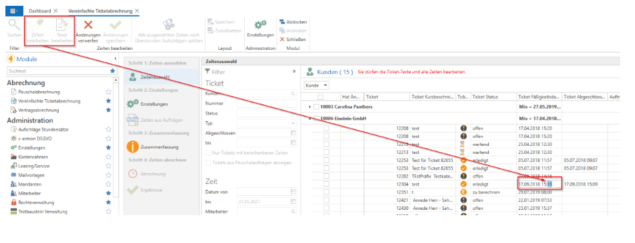
The new simplified ticket billing module can be found under Billing (provided you have the "Create invoices" permission). Once opened, you will see a navigation bar on the left and the main window on the right.
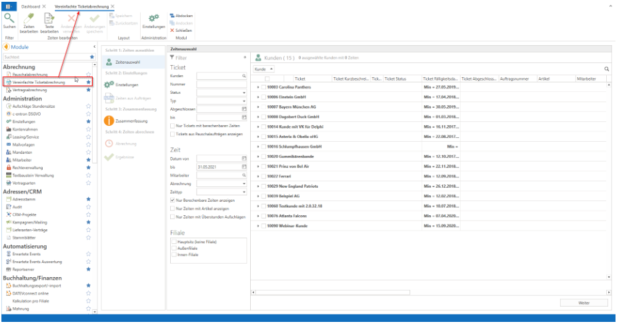
Step 1: Select times
The main window in the "Time selection" menu item offers various filter functions divided into tickets, times, and branches. Tickets can be filtered by customer, number, status, type, and ticket completion date (from/to). This allows you to filter tickets according to certain criteria, and these times are displayed on the right-hand side of the table. The Time filter allows you to filter times within a certain period, by specific employees (assignment according to the item for which the time was recorded), by billing status, and/or by a specific time type. In addition, you can decide whether you want to display "only billable times," "only times with items," and/or "only times with overtime surcharges."
There is also the option to filter by different branches.
A special feature is the filter by billing status, as this offers the option of filtering by periods with a previously defined status.
If, for example, three different employees are involved in billing at a company, a status can be stored for each of these employees in the settings. Clicking the [Settings] button takes you directly to the billing status settings (also found under Global Settings - Ticket - Billing - General), which can be freely defined.
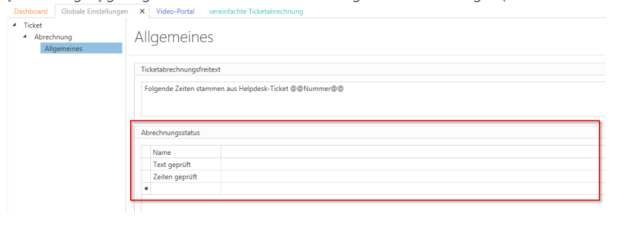
Here, for example, "Texts checked" is created and saved as the billing status for one employee and "Times checked" for another employee. The first employee can then filter by billing status "Empty" and receive all times without status. Now they can "check texts" and then change the status to "Text checked." (This billing status is only a filter and can only be found in "simplified ticket billing" and has no effect on the time or ticket status.)
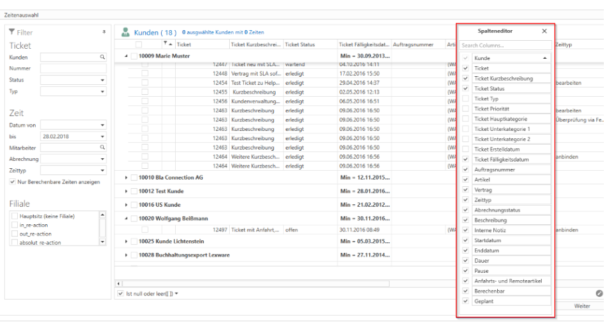
When a customer is opened, their times are displayed, with each line representing one of the customer's times. You can control the selection and order of the columns using the column editor (right-click on a column name -> Open column editor) and also save this in your personal profile.
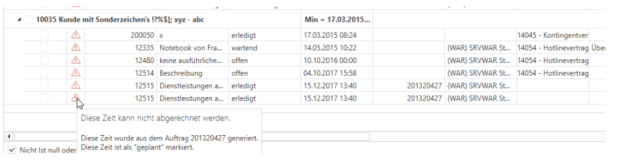
If a time cannot be billed, this is indicated by an exclamation mark. When you hover over the symbol with the mouse, a message appears explaining why this time cannot be billed (e.g., "is planned," "has no article," etc.).
The "Edit times" button in the menu bar allows you to freely edit one or more times to correct or amend texts, times, or billing status. The "Edit texts" button only allows you to edit text fields such as "Description," "Internal note," etc. The times, the assigned contract, or a date cannot be changed here.
Example: To define the billing status, click on [Edit times], select the time to be edited, edit the description text, and then set the billing status to "Text checked." Save everything by clicking on [Save changes]. Now the next employee who checks the times can set the filter to "Texts checked" and receive the checked times. After they have checked the times and set the status to "Time checked," the next employee can filter using the "Times checked" filter and have the times they have marked checked calculated by clicking on [Continue].
Step 2: Settings
Under Settings, you can configure how the selected times for each customer should be transferred to the invoice.
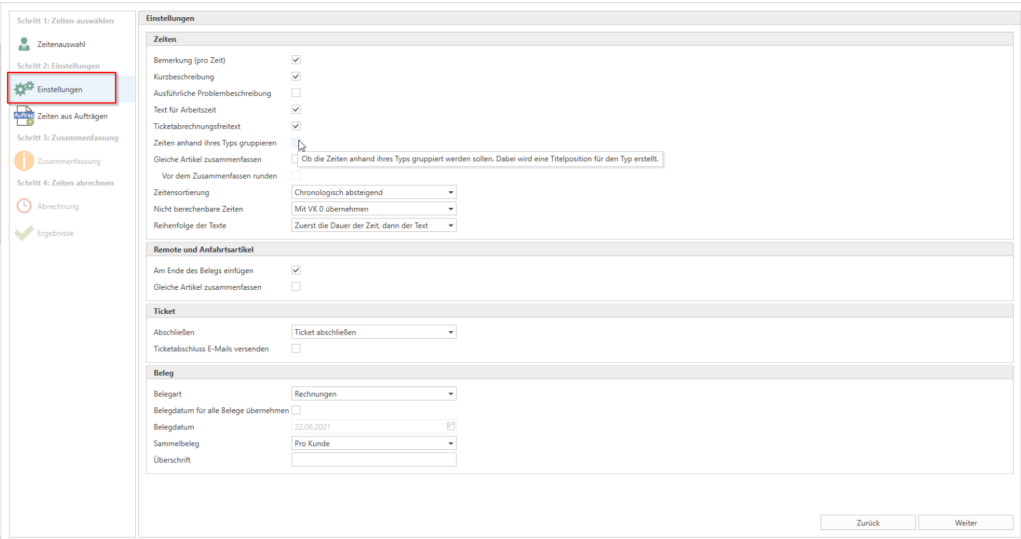
Such as comments per time, brief description, and other details, and whether the ticket should be closed if there are no further open billing times.
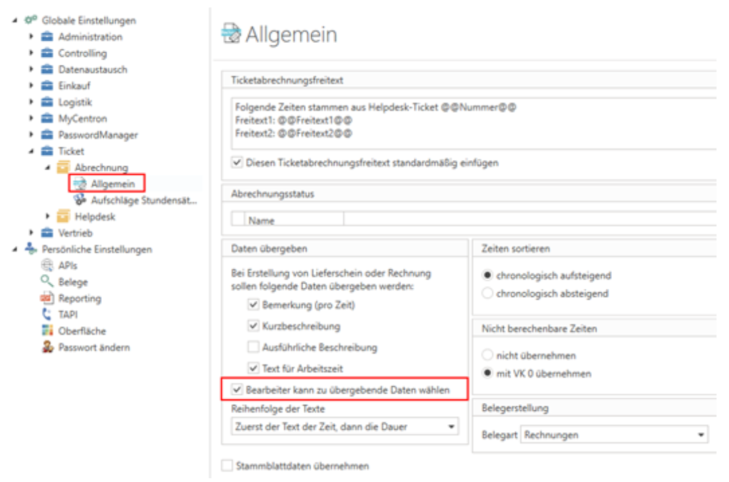
NOTE: Selecting the correct email template depends on the document type you have specified in the ticket billing settings.
Depending on whether you use invoices or delivery notes, the appropriate mail template is selected automatically. (These can be defined in the "Mail Templates" menu—if nothing is defined here, a standard mail template is used.)
These settings can also be configured under Administration - Global Settings - Ticket - Billing - General and deactivated by unchecking the box next to "Agent can select data to be transferred." This prevents this setting from being edited in ticket billing (and it appears grayed out).
Once all settings have been configured as desired, click [Next] to proceed to the next step.
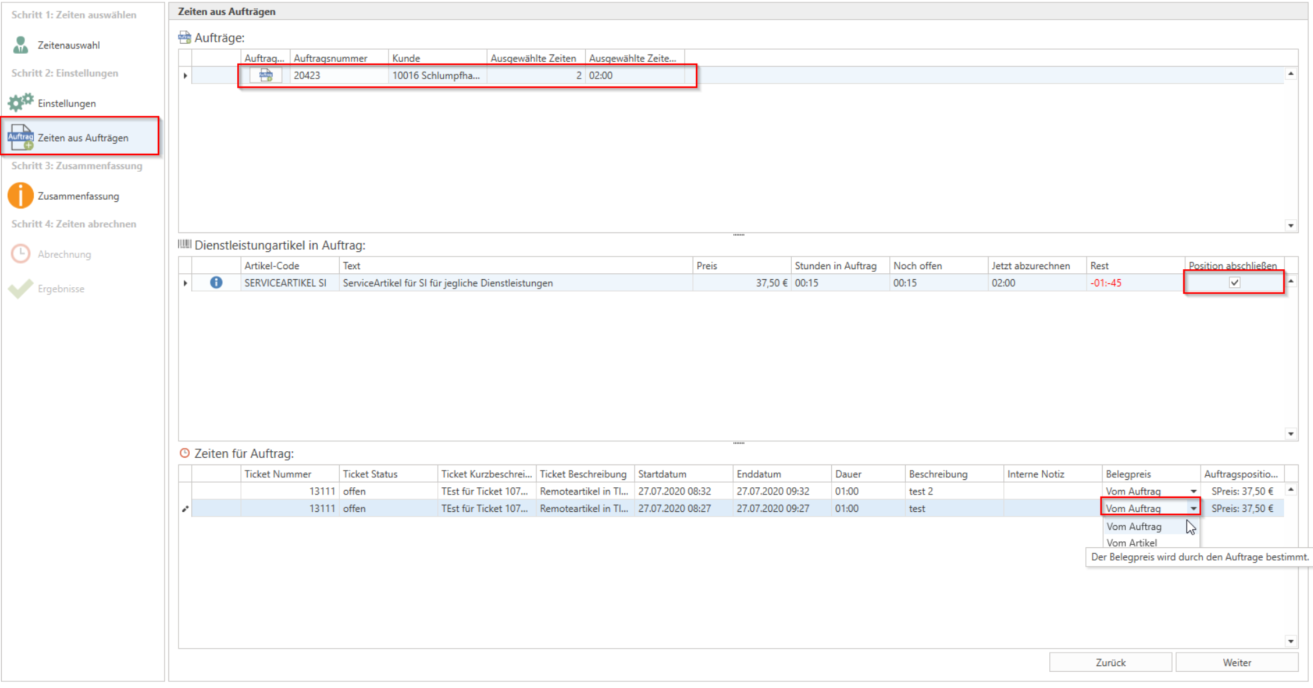
Step 3: Times from orders
If you have selected times that belong to a ticket linked to an order item (manually or via "automatic ticket creation from order"), the "Times from orders" tab will become visible. Here, you will now see the corresponding "orders" for the individual times and the linked order items below them. You can now check the "Complete item" box for the respective order item. This means that when the time is billed, this item is "completed," i.e., the quantity is changed to "0 items," and the order is also completed immediately if all items in the order now have a quantity of "0."
In the lower section, the default selection for calculating the time is preselected as "from order." In this case, the price of the service item in the order item is used in the billing. If this differs in the work unit from that of the item in the time, the price is converted to the work unit of the time item. (Example: You have an item in the order with a work unit of 1 hour at a price of $120. However, the employee item for this time has a work unit of 15 minutes at $40 stored in the item management. The time is then billed at a price of $30, as the price for 1 hour (3600 seconds) was set at $120 in the order with the customer. This price is converted to the unit of the employee item – 15 minutes (900 seconds) = $30. This is also displayed in the "Order items" column However, if you want to bill this time according to the "normal price of the item" rather than the order price, select "from item" here. In this case, the price of the order item is ignored and the normal price is taken from the item (in the above example, this would be 40).
Step 4: Summary
The summary shows the selection made and offers the option of displaying a preview in the delivery note/invoice view, which has two advantages:
1. For inexperienced users, a means of control and verification.
2. In the invoice view, additional free text can be customized or a delivery note can be attached.
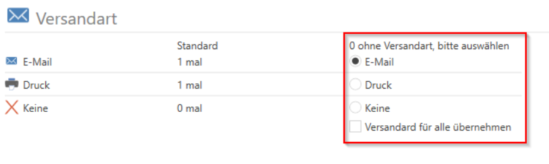
Furthermore, the shipping method for the invoice for the respective customer can be seen here.
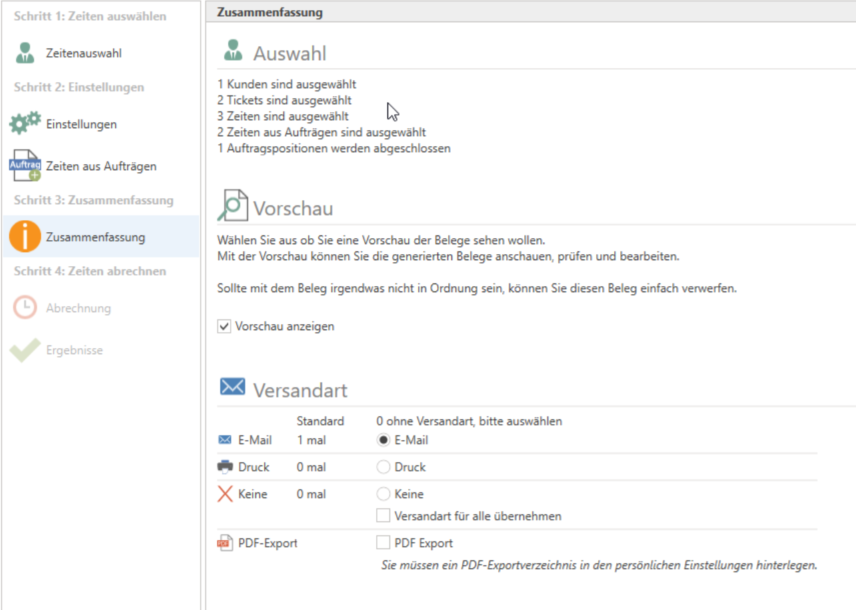
If "None" is selected, this customer does not have a default shipping method. Here, you can select a shipping method for these customers on the right. The other customers will receive the invoice by default, unless the "Apply shipping method to all" checkbox is selected, in which case everyone will receive the invoice using the selected shipping method.
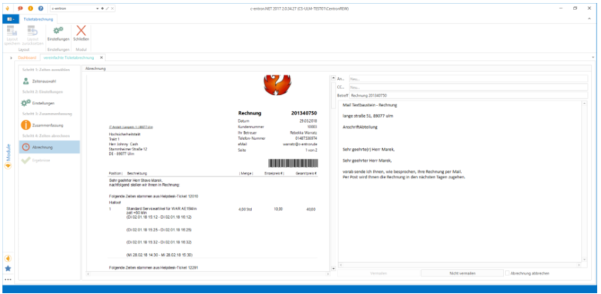
Step 4: Calculate times
When you click on [Start billing], a message will appear stating that no further changes can be made to times or settings during billing. Clicking on [Start billing!] starts the billing process and, if the preview has been activated, the invoice module opens after a short time. If everything is as desired, click on the [Save invoice] button at the top of the menu bar.
This will return you to the billing page, where you can view a preview of the invoice before sending it. If everything is correct, click [Send] to send the invoice.
If [Do not mail] or [Cancel billing] is selected here, the invoice has already been saved but not sent.
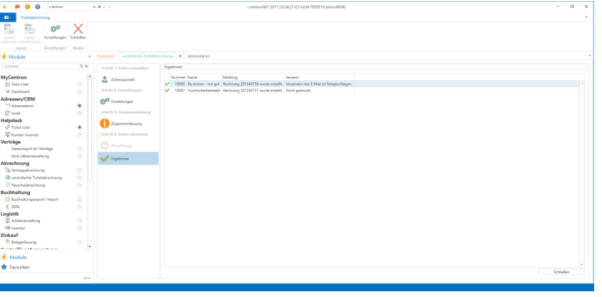
At the end, you will see an overview of the results showing the status of which invoice was created and whether the sending/printing was successful.
NOTE: The master agreement is automatically preselected/assigned for new tickets and documents.
Times recorded for a ticket are automatically assigned the ticket contract preselected, in this case also the framework agreement.
However, if this is removed from the ticket, new times will not be automatically assigned to a contract.
Only the time contract plays a role in billing, because the time is then also booked on this contract.
If the time does not have a contract (because it was removed manually or because the ticket did not have a contract at the time of time recording), the time is not booked against a contract and is not compensated.
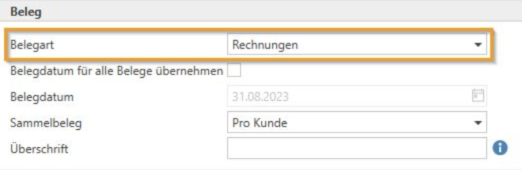
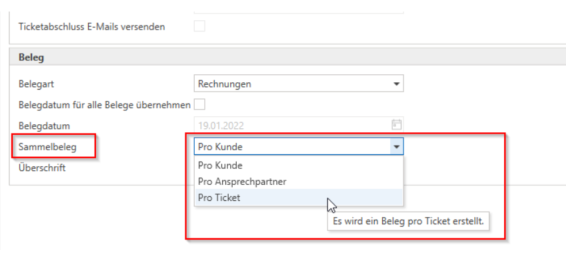
New setting for collective documents
(from release v2.0.2201.x)
In the "Settings" for simplified ticket billing, the option "per ticket" has now been implemented in the "Collective receipt" setting. If this option is selected, a separate receipt is created for each ticket.
If the ticket statement contains only one cost center and one cost unit for all items on this document, this information is transferred to "Document details -> Cost center/cost unit." If there are two or more different cost centers or cost units, this information is not transferred to the document details.