%20(1).png)
Outlook Add-In for the new Outlook
The new Outlook add-in
The Outlook add-in for c-entron helps you quickly and easily integrate incoming emails into your workflows. With just a few clicks, you can:
→ Assign emails directly to customers, tickets, or receipts
→ Save documents from Outlook to c-entron
→ View customer and ticket information without switching programs
This way, you can keep track of everything, save time, and have all the important information in one place.
The new Outlook add-in was developed for use in the "new" Outlook. Due to extensive technical changes made by Microsoft, our previous add-in was not compatible with the "new Outlook." During development, various features were revised and modified.
Licensing
Licensing continues to be based on seats, meaning you have access to as many concurrent user/device logins as your company has purchased licenses for.
Note: Some features in the Ticket section require a valid ServiceBoard license and may be disabled if your company does not use ServiceBoard.
Installation and Configuration
The add-in is not installed locally; instead, it is included in NExus and must be managed and deployed through the Microsoft O365 Admin Center.
You can find the installation instructions at this link:
https://hilfe.c-entron.de/de/technisches/Working-version/installation-es-add-in-fur-das-neue-outlook
Getting Started and Signing Up
Since the add-in is installed on Exchange, it is available to individual users or all users in your company. You can access it by clicking the small c-entron icon within the email or in the Outlook menu bar in the Add-ins click. In "classic Outlook," the icon is only available in the ribbon or is hidden there under the "All Apps" button.
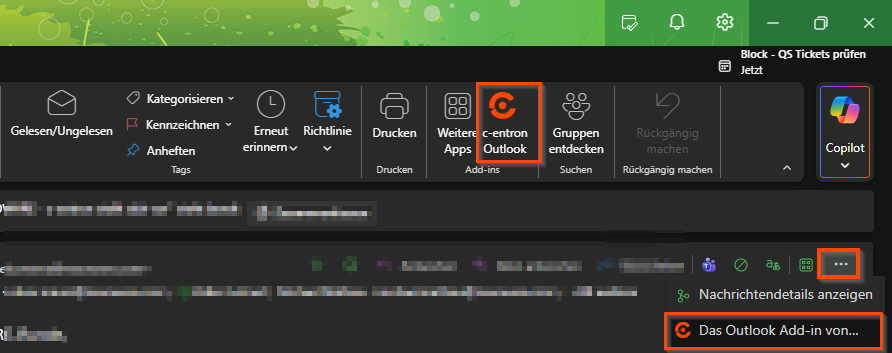
→ Click the icon to open the add-in on the right side of the window.
→ If you haven't logged in yet, the login dialog will appear.
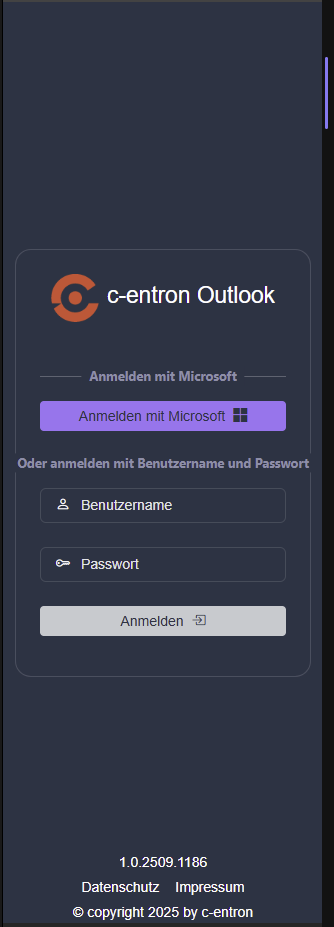
Sign in using your c-entron login credentials. If your company has enabled the OAuth method, you can also sign in with your Microsoft account.
Note: If you have already signed in to your current Outlook session, you can skip this step.
The add-in can be pinned to the right edge of the window so that it remains active at all times.
The appearance (dark or light mode) depends on the Outlook settings, so it adapts to the mode in Outlook.
Structure of the Add-In
The add-in has four workspaces, which are displayed in tabs:
→ Customers
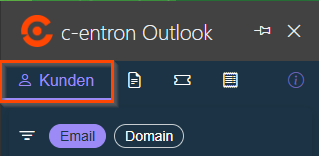
→ Documents
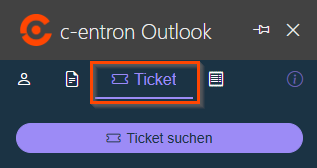
→ Tickets
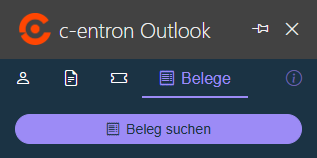
→ Receipts
The options displayed there vary depending on the email subject. For example, if the subject refers to a specific ticket, that ticket will already be loaded in the ticket section, and you can view information about the ticket's status there.
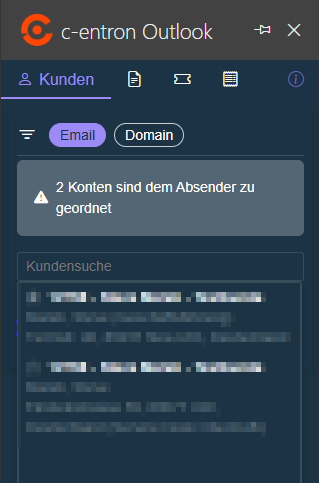
Area of Focus: Customers
In the area of Customers You'll see details about the email sender. If the email address can be linked to a contact, that contact will be displayed.
Tip: With the Domain Search you can still find customers even if the email address isn't associated with a contact person.
If the domain search also yields no results, customers can be searched for using the search field by entering their name, customer number, street, ZIP code, city, or contact person.

Click on Open the customer in ServiceBoardto display the customer directly in ServiceBoard.
Click on Open customer in c-entronto open the customer in c-entron.
Contact persons (IDM, ADM, technicians, etc.) are displayed only if the information is available in the customer master. Also Origin and Sales territory are displayed if they have been maintained.
You can Address using a drop-down menu.
Contact person can be expanded to view additional contact information. Click on the contact person to view their phone number and email address.
Click on More informationto view more information about the contact person in a separate window.
Click on Ticketsto view the customer's ticket list in ServiceBoard.
Click on CRMto access the customer's CRM activities in the Outlook add-in.
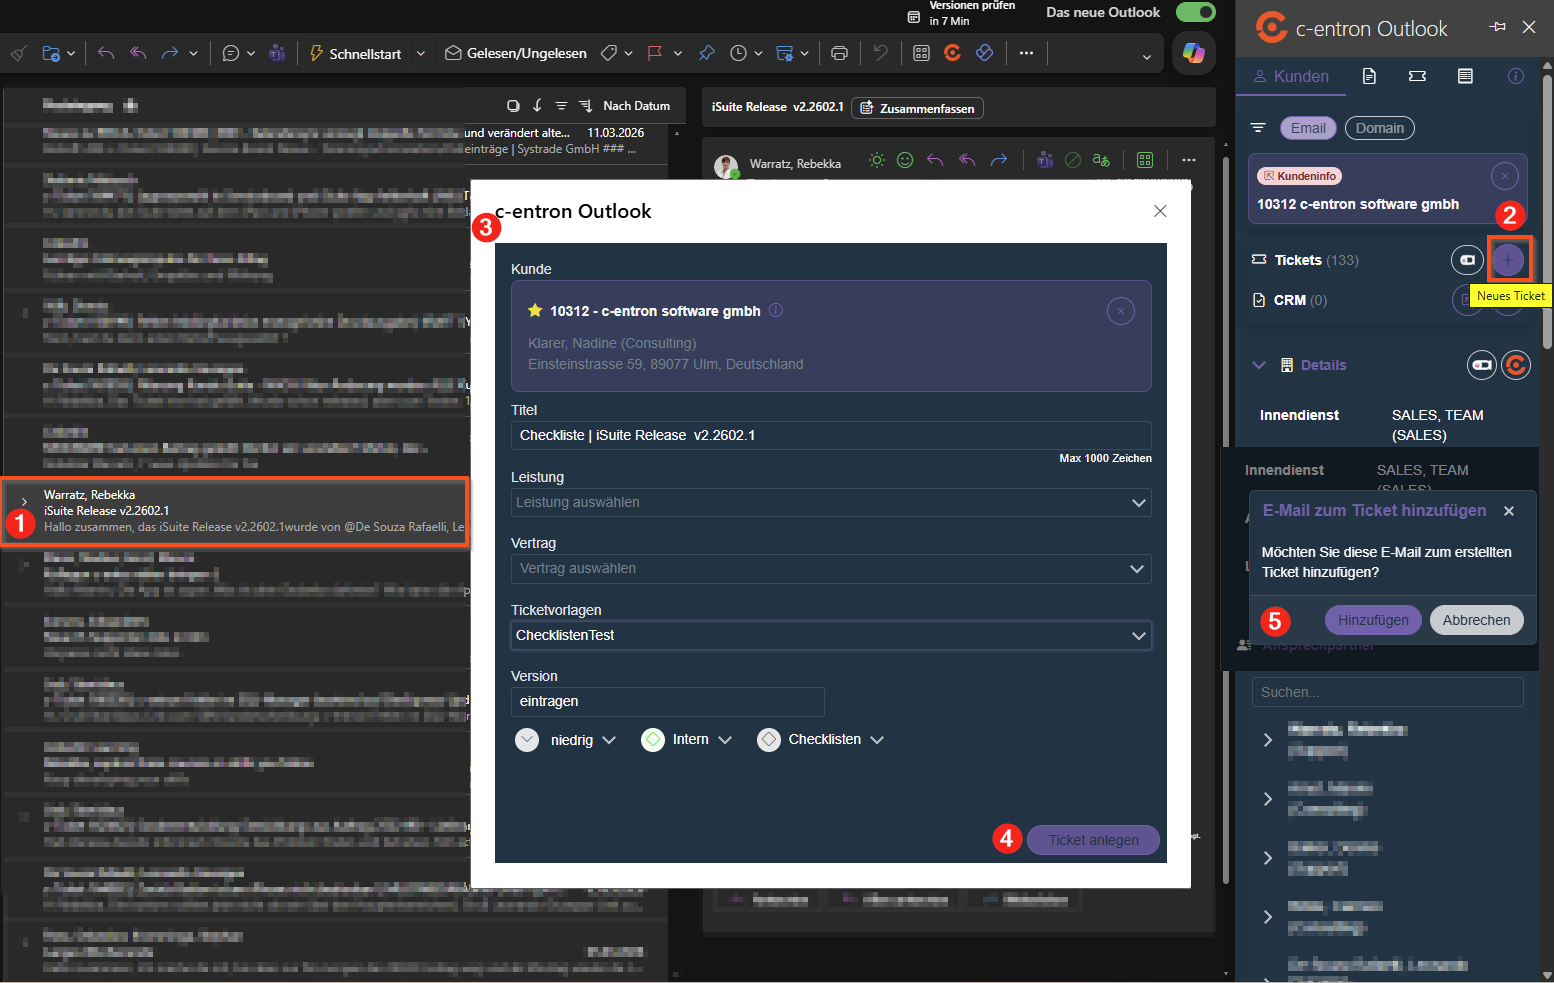
Starting with release v2.0.2605.x
We've added the ability to create a new ticket directly from a selected email—the subject line is used as a short description, the email body as the description, and the email itself is automatically added to the ticket.
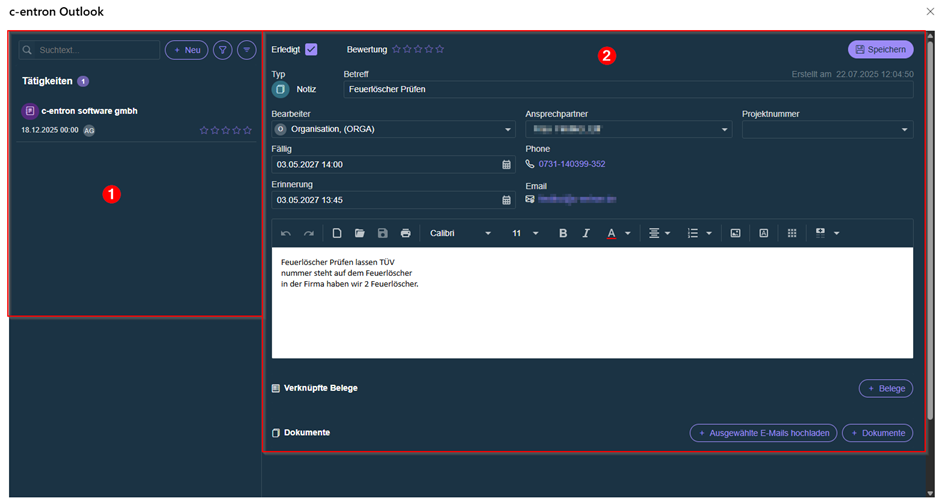
CRM Activities in the Outlook Add-In
The "CRM" section gives you direct access to the CRM activities associated with the customer, allowing you to edit or create new ones.
Once opened, the view is divided into two sections:
(1) Search and filter section
(2) Scope of work
Search and Filter Section
In the search and filter section, select the desired task to view and edit it in the workspace.
In addition, new CRM activities can be created here.
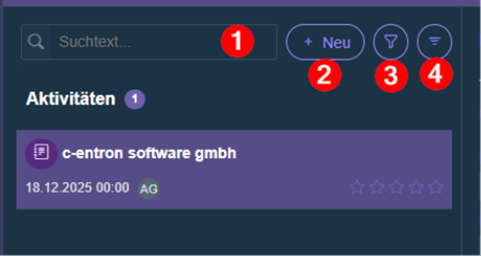
The following features are available to you:
Search box
You can use the search box to look for a keyword that appears in the activity's subject line.“+ New”
Click "+ New" to create a new CRM activity. The Outlook add-in will use the currently selected email to automatically populate the subject, description, and contact fields.Filter
Using the filter settings, you can sort the activities by Type and Author filter. You can also choose to display tasks that have already been completed.Outline
Use the "Expand" button to view the activities by Author, Due date or Type group.
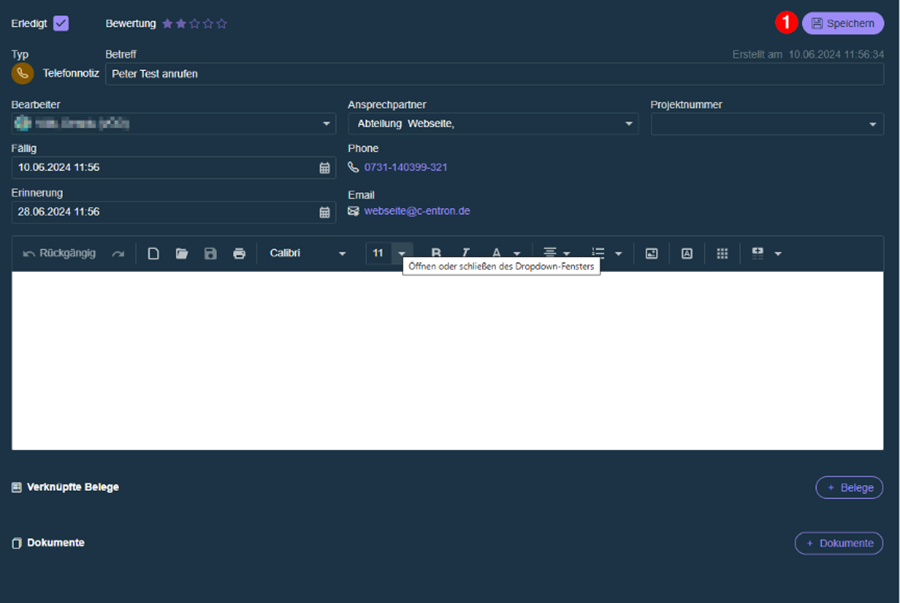
Scope of work
The details of the selected CRM activity are displayed in the workspace. Here, you can edit and manage the activity.
The following actions are available to you:
Position as "Done" select
Give a rating
Change the assigned staff member
Adjust due date
Change contact person
Select a CRM project
Add to description
link to open documents
Save documents
Note: When creating new tasks or making changes, a manual saving is required. For newly created activities, linking to documents and uploading documents is only possible after the activity saved for the first time was.
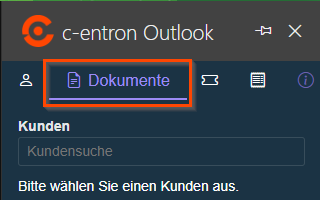
Work Area: Documents
Here you can see the c-entron directory structure for the identified customer. You can save an email in a specific directory.
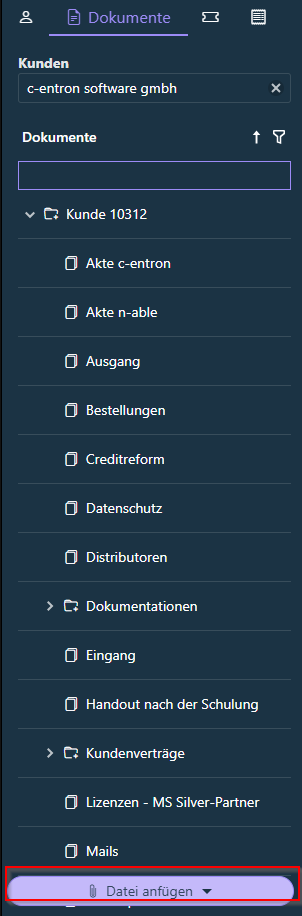
→ Select the desired directory.
→ Click on Attach fileto save the email in c-entron.
Note: Directories for tickets and receipts are not displayed here. Please use the respective workspaces for this purpose.
Work Area: Tickets
Here you'll find details about a ticket that can be automatically detected or manually searched for.
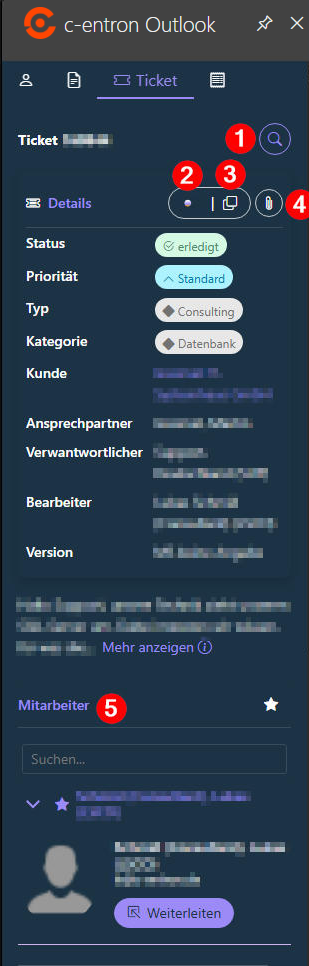
Enter a Ticket number if no ticket has been suggested or if you want to choose a different one.
Click on Open a ticket in ServiceBoardto process the ticket in ServiceBoard.
Copy the Link to the ticketso that you can use it in a browser or in a message.
Click on Attach emailto attach the message to the ticket. A dialog box will open where you can choose between email and attachments.
💡 Tip: Email signatures often contain small image files. You can ignore these.
5. You can Employees Select an employee and forward the ticket to them. Use the star next to an employee's name to mark them as a favorite and shorten the list.
Work Area: Documents
In the area of Receipts you can view details about receipts.
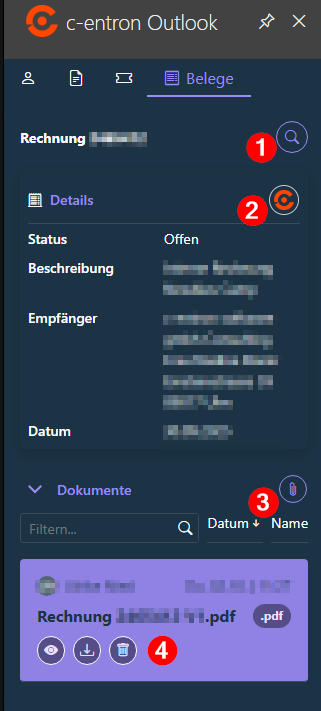
Search one specific document instead of the proposed one.
Click on Open the document in c-entronto open the document in c-entron.
Click on Attach emailto link the message or attachments to the document.
You can already uploaded documents view, open, download, or delete.
Planned expansions
In future versions, the add-in will be enhanced with additional features:
→ File emails using drag-and-drop
→ Create a new ticket directly from an email
We look forward to making these features available to you soon.
🆕 CRM Outlook Template (Available starting with release 2.0.2605.x)
Using the function “CRM Outlook Template” You can specify which CRM activities are automatically synced with Outlook.
In addition, the following can be defined:
what the Outlook appointment is named
what information is displayed in the appointment
Synchronization simplifies schedule management and ensures consistent data maintenance between c-entron and Outlook.
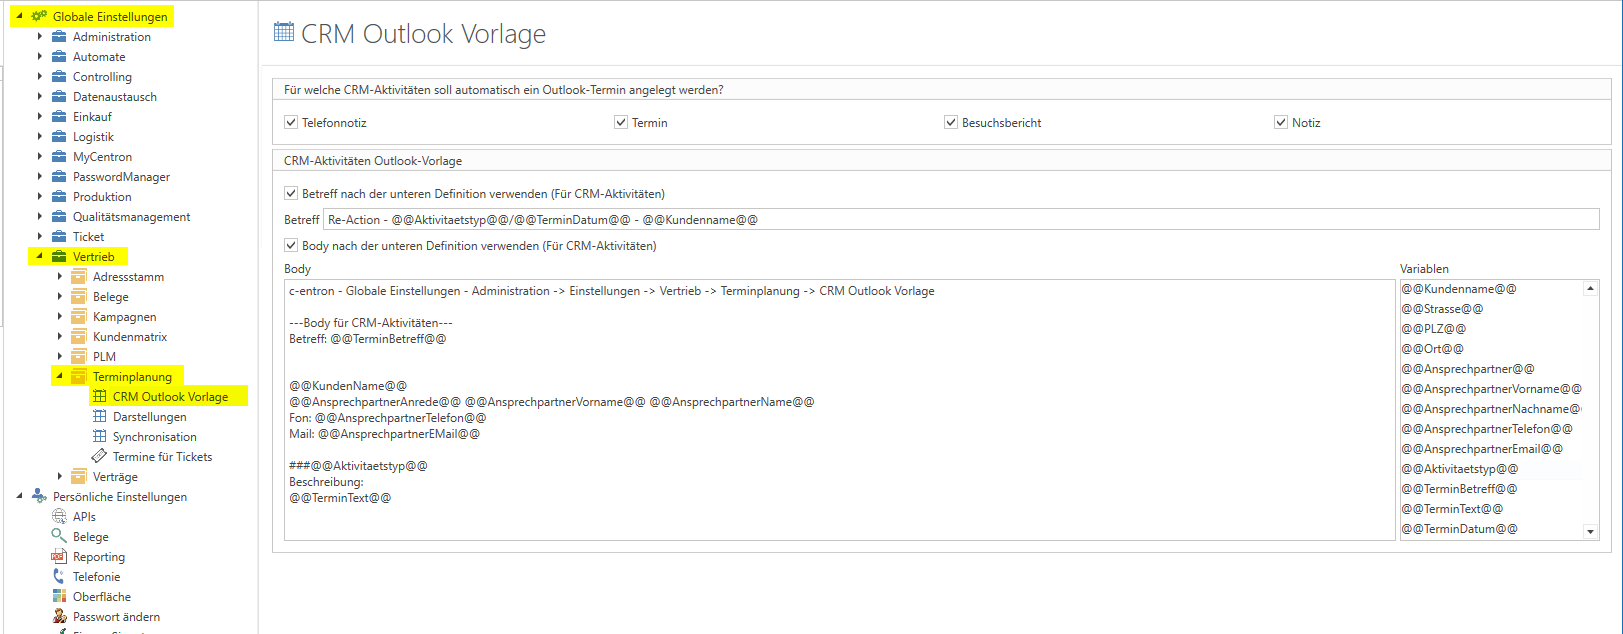
Settings
In c-entron, under Global Settings -> Sales -> Scheduling -> CRM Outlook Template, you can now specify for which CRM activity types appointments are automatically created and synchronized.
Enabling Synchronization
In the upper section, you can select the CRM activity types for which Outlook appointments should be created automatically.
Available activity types
Phone memo
Date
Visit Report
Note
Procedure
Enable the desired activity types
Save settings
Synchronization occurs automatically as soon as an activated CRM activity is created or edited.
Set the Outlook subject line
With the Option “Use subject line as defined below” You can set a custom subject for Outlook appointments.
Example
Re-Action - @@Activity Type@@ - @@Date@@ - @@Customer Name@@
Result in Outlook
Re-Action - Date - May 15, 2026 - Musterfirma GmbH
Define the content of the Outlook appointment
With the Option “Use body based on the definition below” The content of the Outlook appointment can be customized.
There are various variables available for this purpose.
Available variables (excerpt):
Variable | Description |
|---|---|
@@Customer Name@@ | Customer Name |
@@Street@@ | Street |
@@ZIP Code@@ | Zip code |
@@Location@@ | Location |
@@ContactName@@ | Contact person (first and last name) |
@@Contact Person Phone Number@@ | Phone number |
@@Contact Email@@ | Email address |
@@Activity Type@@ | Activity Type |
@@Appointment Subject@@ | Subject of the CRM activity |
@@EventText@@ | Description |
@@Date@@ | Date of the activity |
The variables are automatically replaced during synchronization.
Example of a body layout
@@Customer Name@@
@@ContactTitle@@ @@ContactFirstName@@ @@ContactLastName@@
Phone: @@ContactPhone@@
Email: @@ContactEmail@@
@@Activity Type@@
Description:
@@EventText@@
Synchronization Behavior
These settings apply to:
Newly created CRM activities
CRM activities handled
Existing Outlook appointments will not be updated automatically.
Result
After successful setup:
CRM activities are automatically displayed in Outlook
Appointments appear directly in the user's Outlook calendar
all relevant information is available in one place
Benefits of this feature:
Unified Scheduling
Automatic Outlook Synchronization
Less duplicate data entry
A clearer overview for sales and back office
Faster appointment scheduling