%20(1).png)
Installing the Add-In for the new Outlook
(As of: May 2026)
Available as a subscription: Pro · Ultimate
Re:
⚙️ Administration
The c-entron Outlook plug-in (up to version 4.0.2401.3) has been discontinued and is no longer supported.
Overview of Installation Options
There are several ways to install an Outlook add-in. The options are listed in the following table:
Central deployment in the Microsoft 365 Admin Center – The administrator uploads the manifest file (see below) to Office, making the add-in available to all or selected users.
Manual installation – Users can install the add-in manually using a URL or a manifest file.
Network sharing – A manifest file can be stored in a shared network folder, and users can install the add-in by specifying the file path.
Installation via the Microsoft Store is not supported.
This guide explains the Option 1 covers:
One Centralized deployment via the Microsoft 365 Admin Center.
Configuration and Initial Setup
Proxy and Network Settings
To successfully install the add-in, you need a SSL-encrypted HTTPS-connection absolutely necessary. You can route these directly through the Nexus server or forward them via a proxy. If a proxy is used, it must correctly pass on the following headers:
X-Forwarded-Proto
X-Forwarded-For
X-Frame-Options
Entra's Facilities
To allow users to sign in with their Microsoft account via the add-in, the following requirements must be met:
The organization's tenant and client have been set up correctly.
The user's Microsoft account is synced with the c-entron account.
For more information, see our general Entra configuration documentation at the following links:
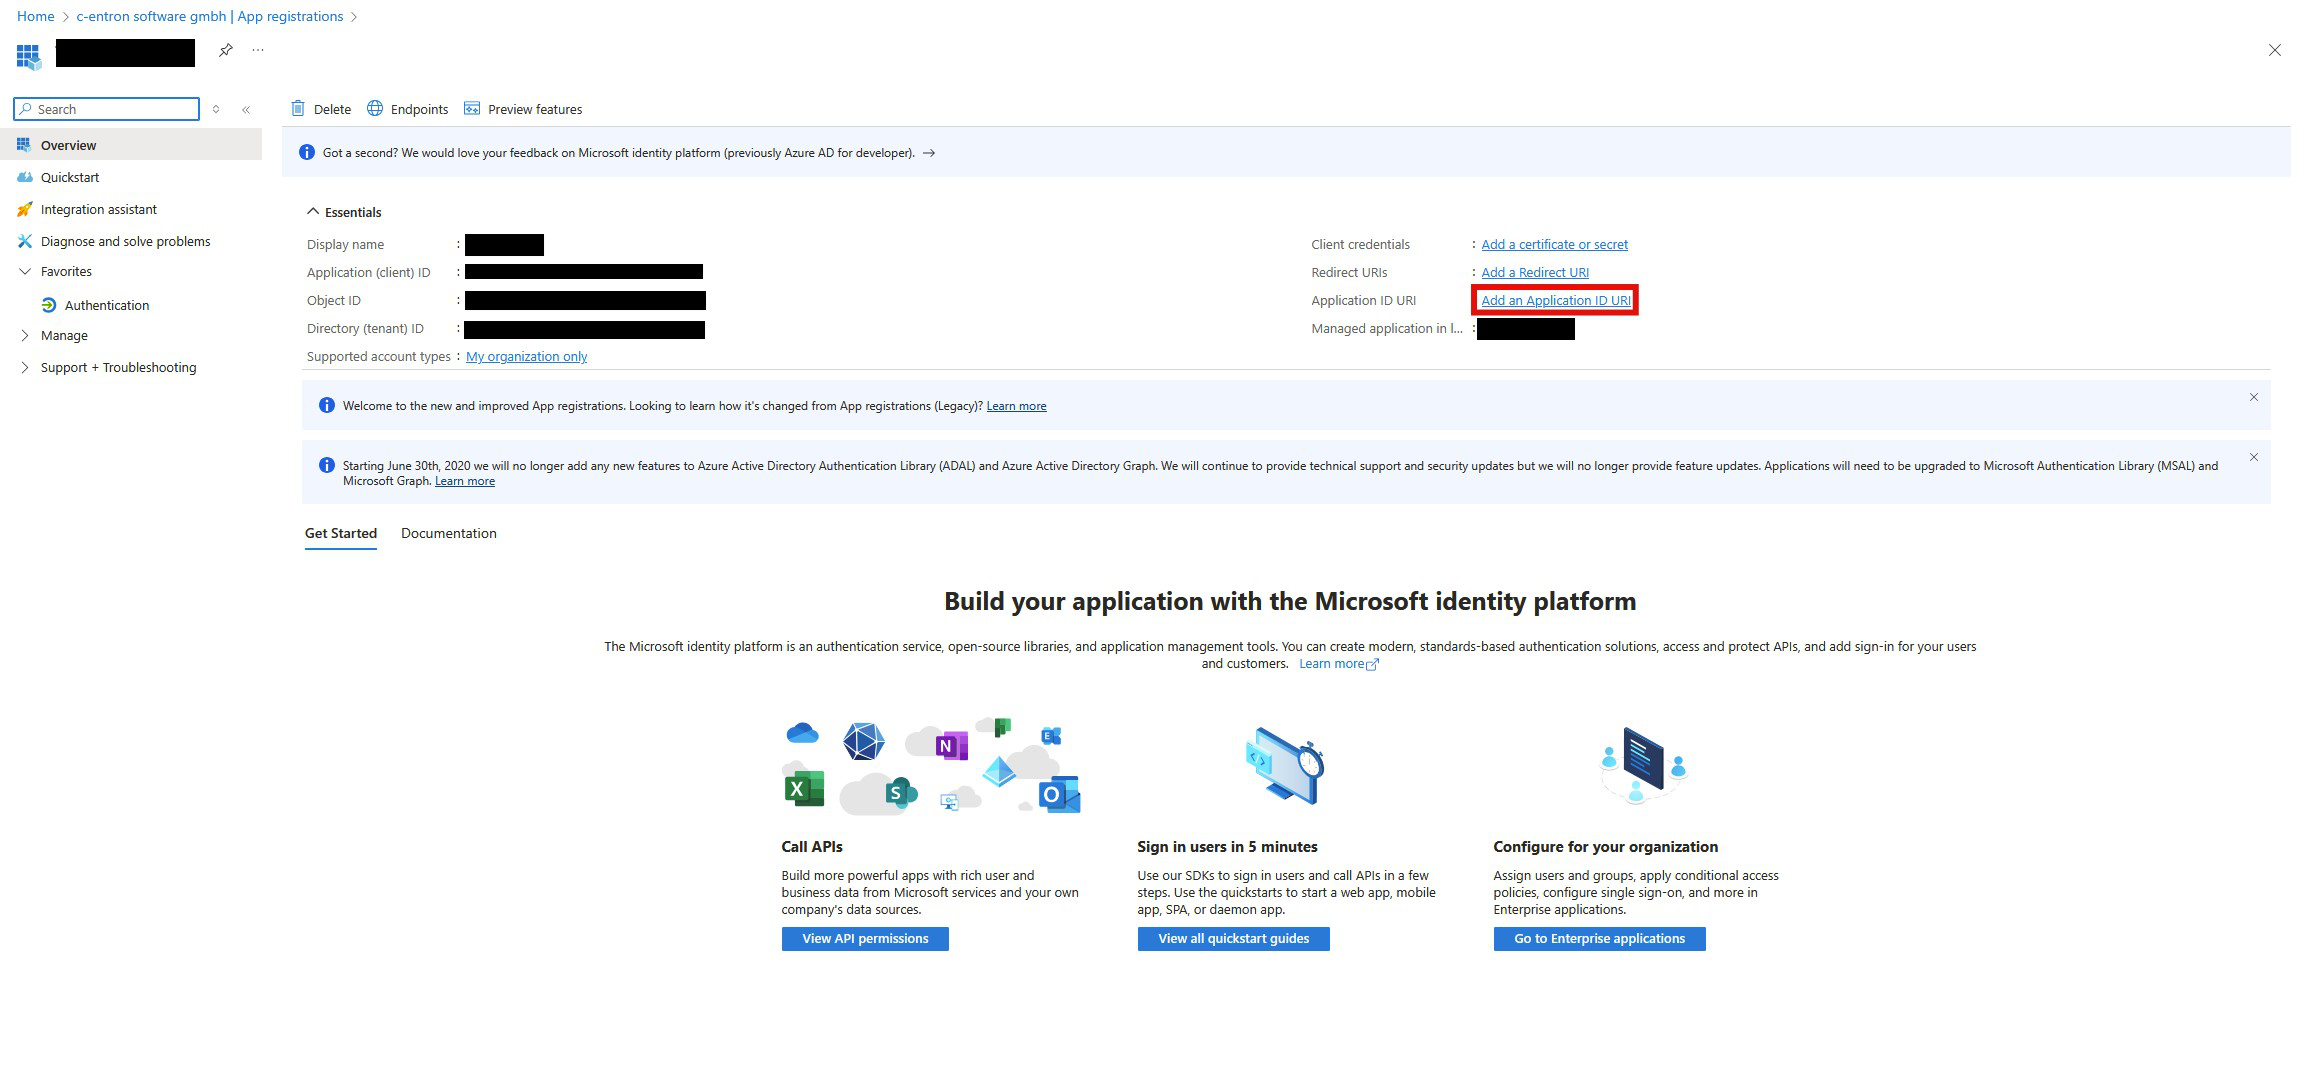
Judge in the Entra ID Portal App Registration Yours Application ID URI one.
For more help, see the Microsoft documentation:
Register an Office add-in that uses SSO with the Microsoft identity platform
In the Entra portal, select the app registration that you use for Microsoft logins.
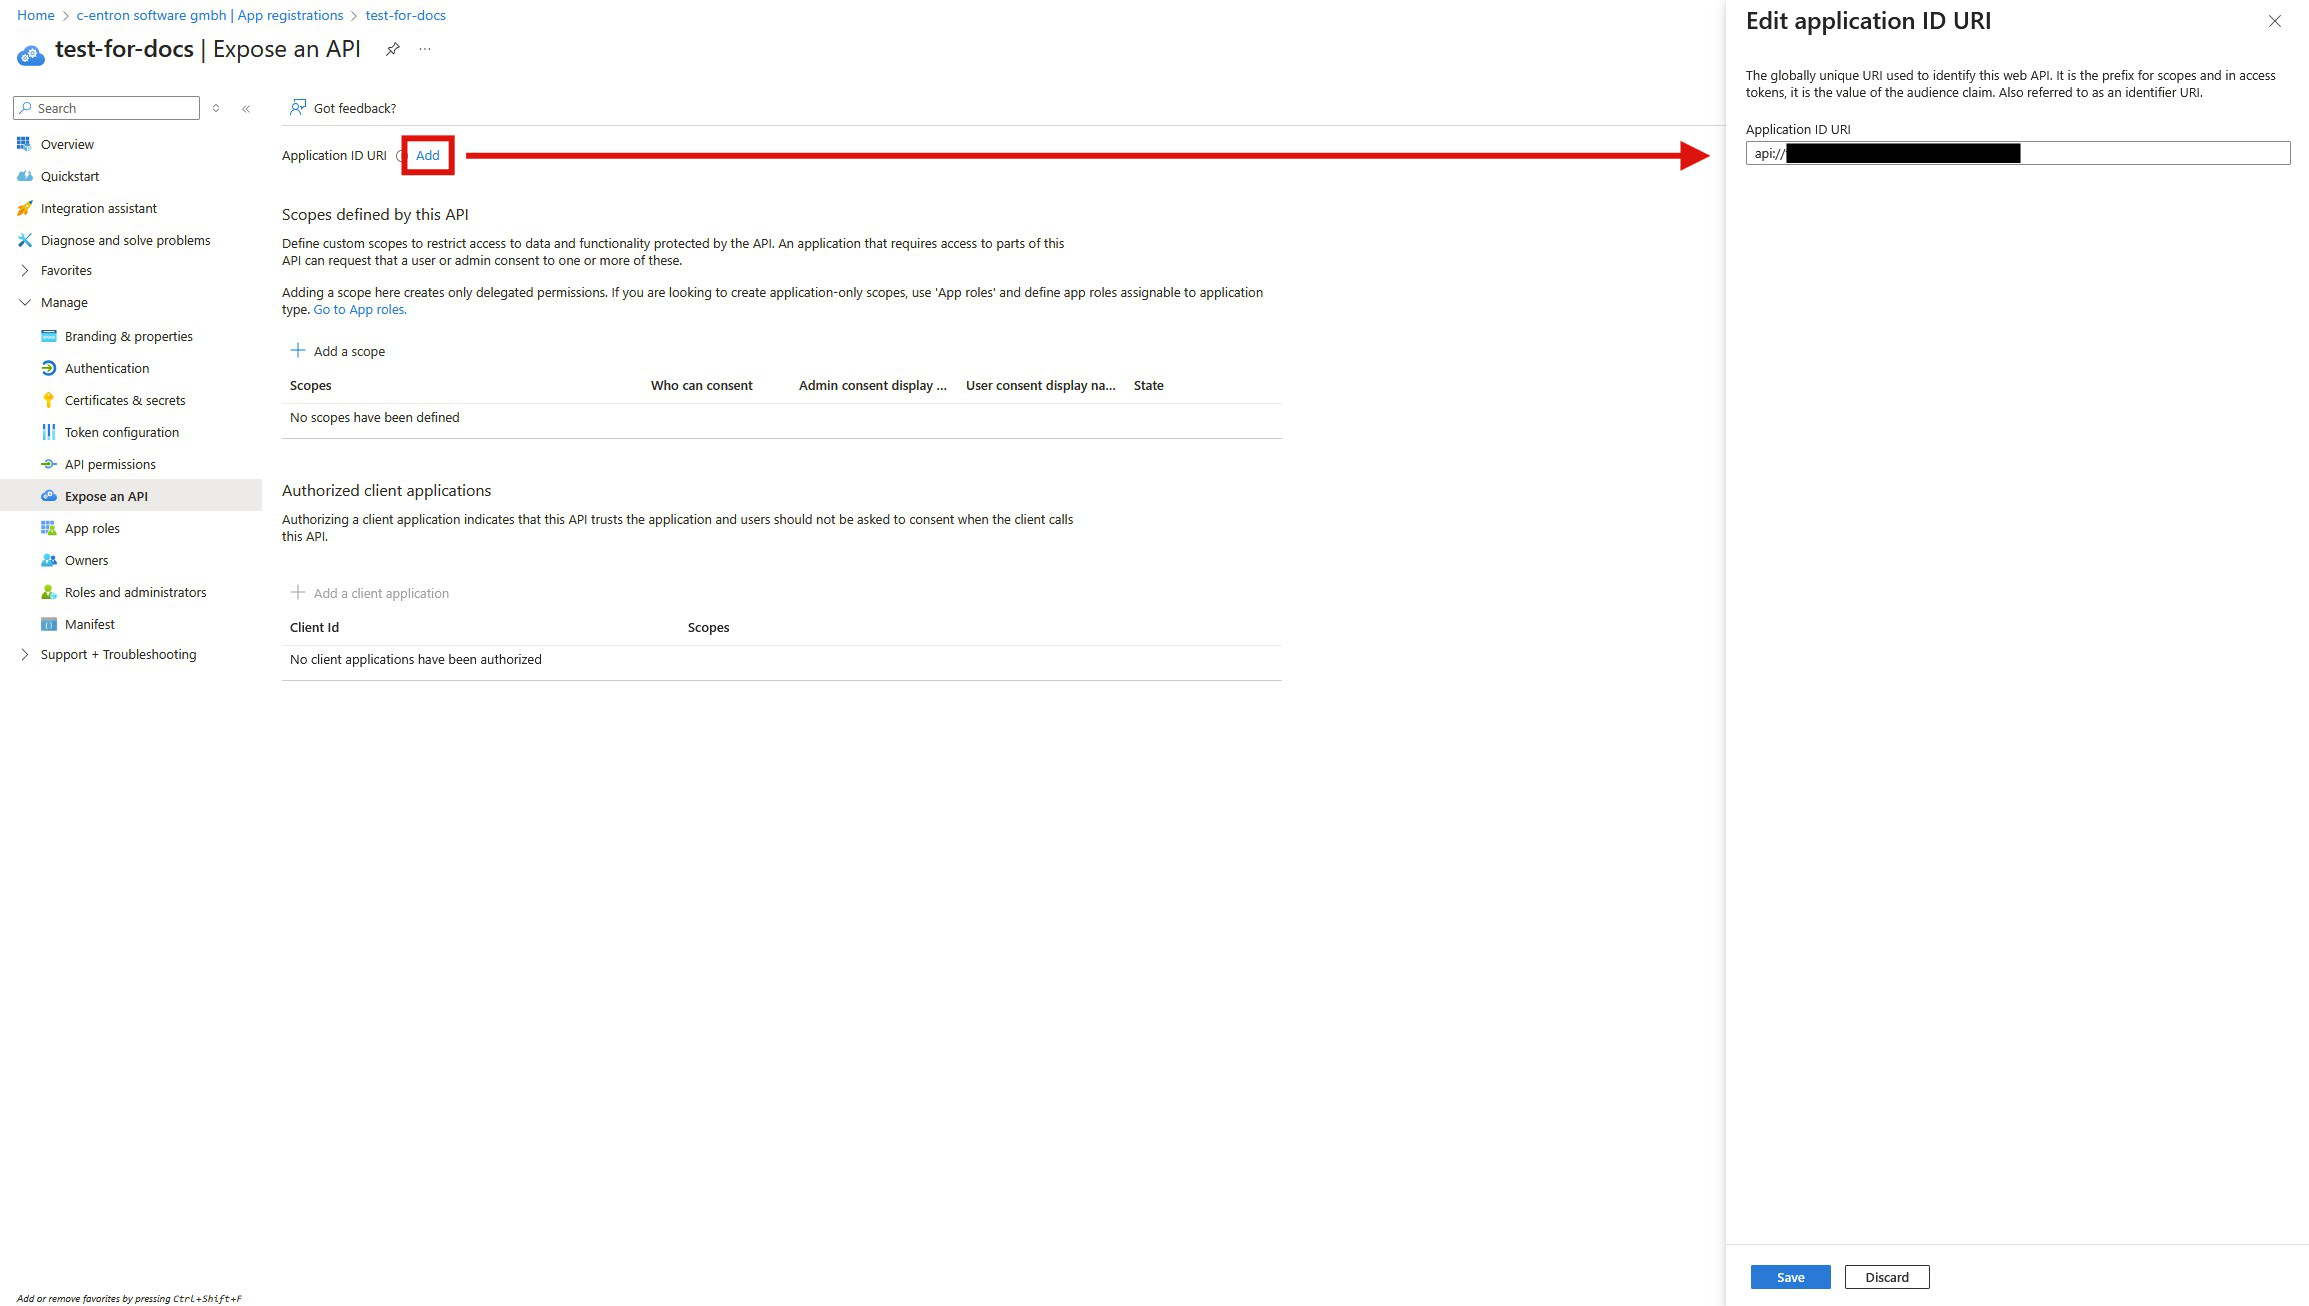
Click "Add an Application ID URI," and then click "Add."
Enter the URL of your Nexus server in the following format:
api://<nexus-server-url>/<client-id-of-the-app-registration>
Example:
Your Nexus server is running on https://nexus.contoso.de
The client ID for your app registration is 00000000-1111-2222-3333-44444444444
Your Application ID URI should then look like this:
api://nexus.contoso.de/00000000-1111-2222-3333-44444444444
Then add a new scope to the API.
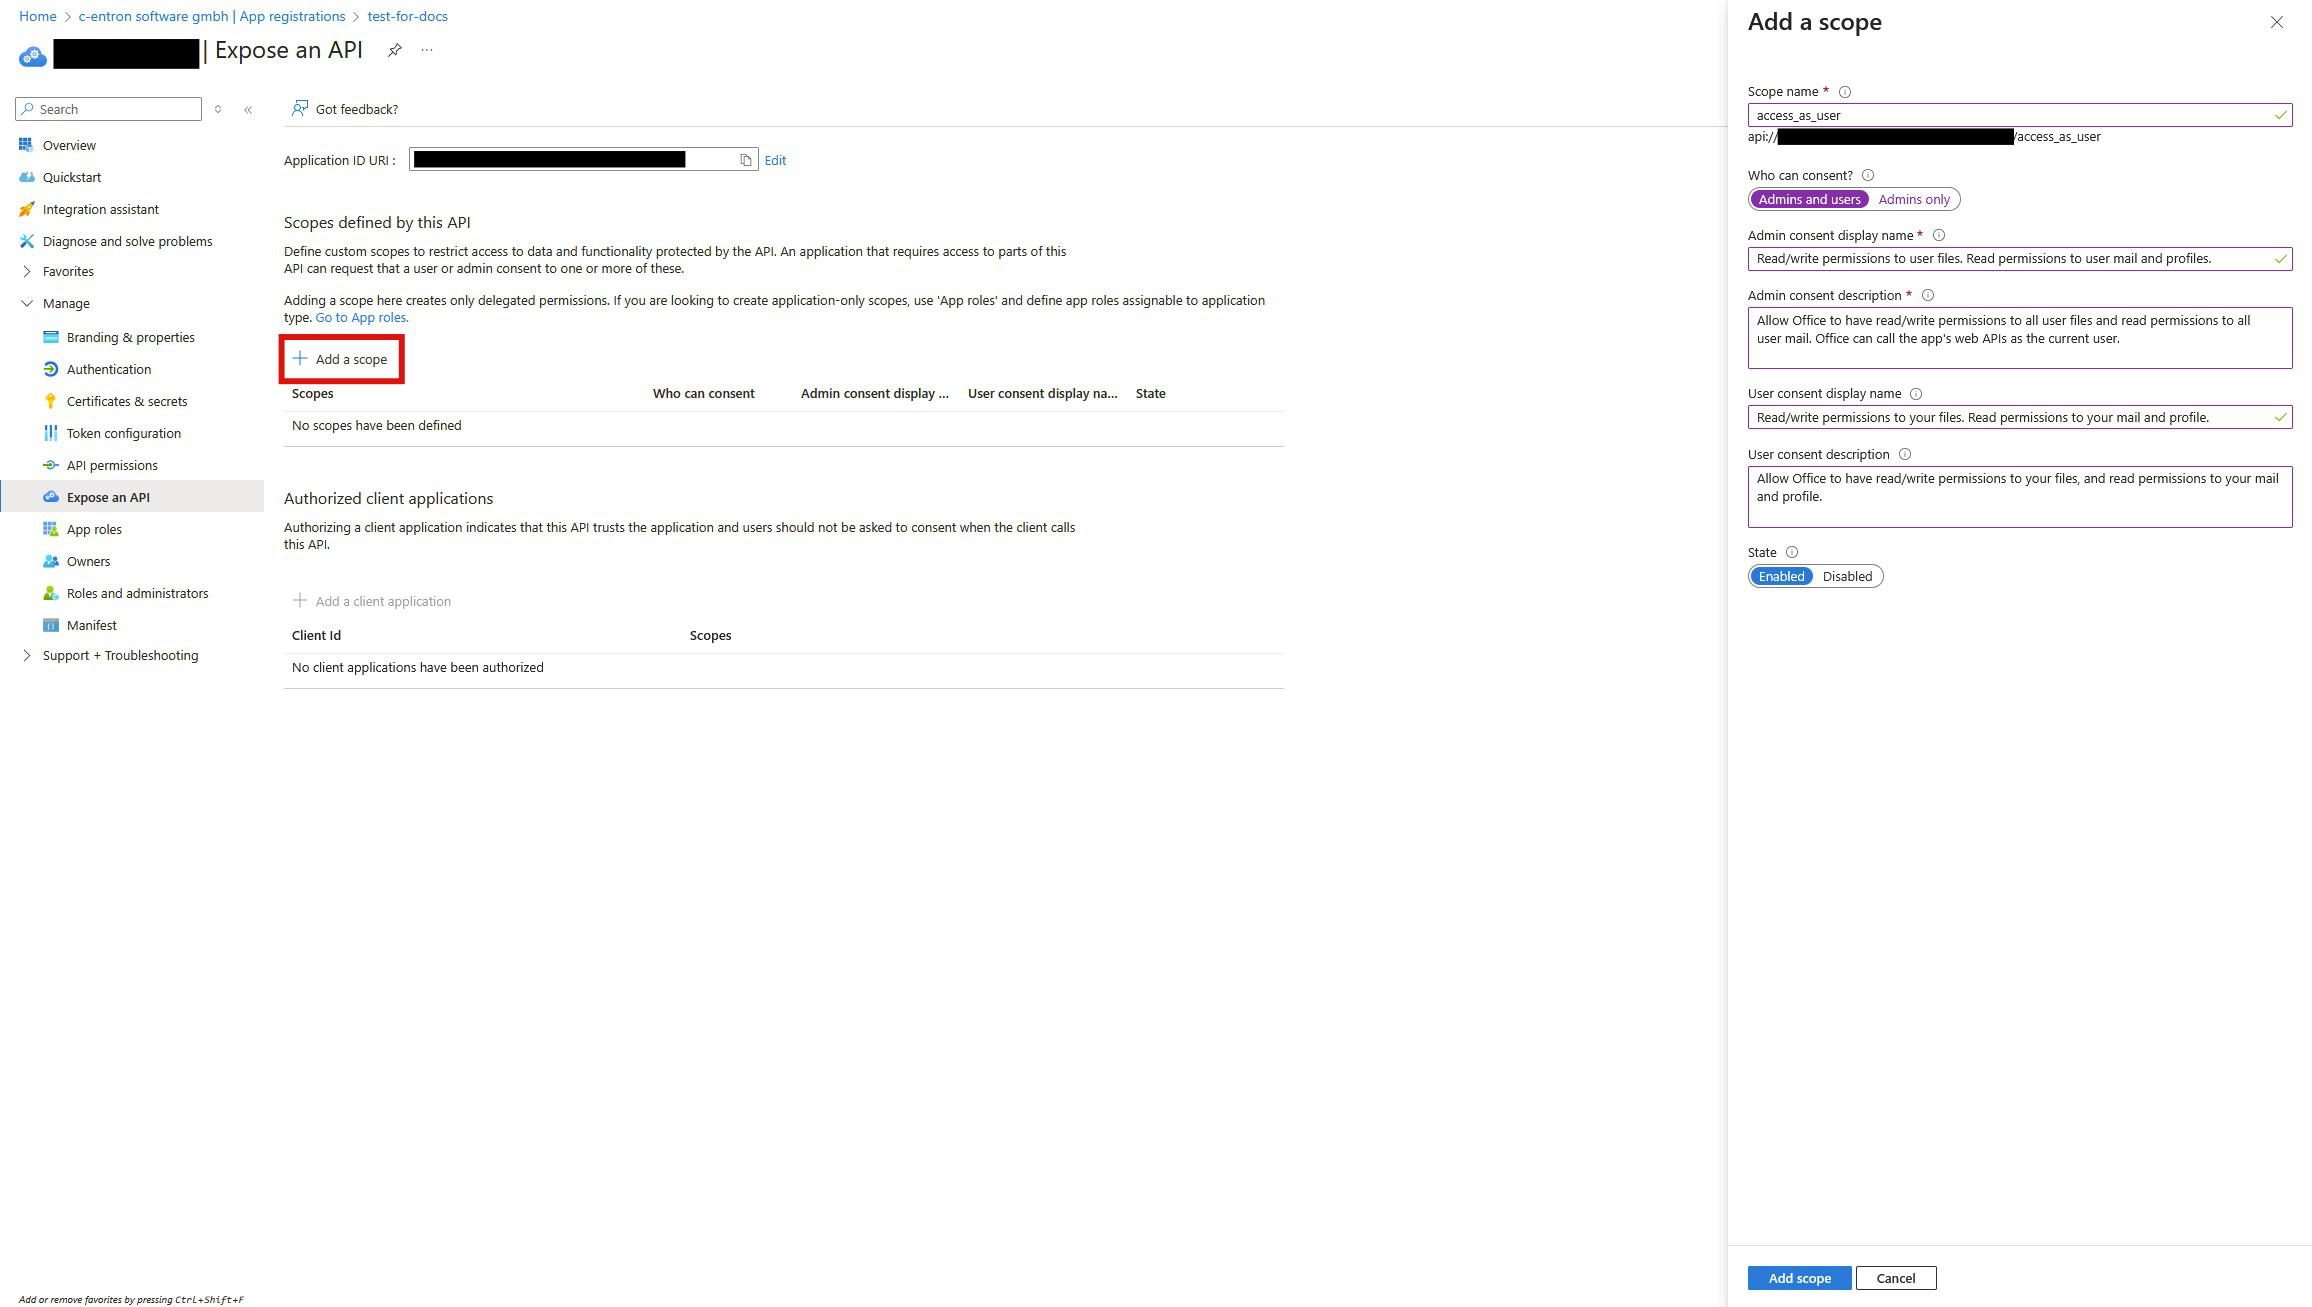
Add Microsoft Client ID
Next, add the following client ID to pre-authorize all Microsoft products:
ea5a67f6-b6f3-4338-b240-c655ddc3cc8e
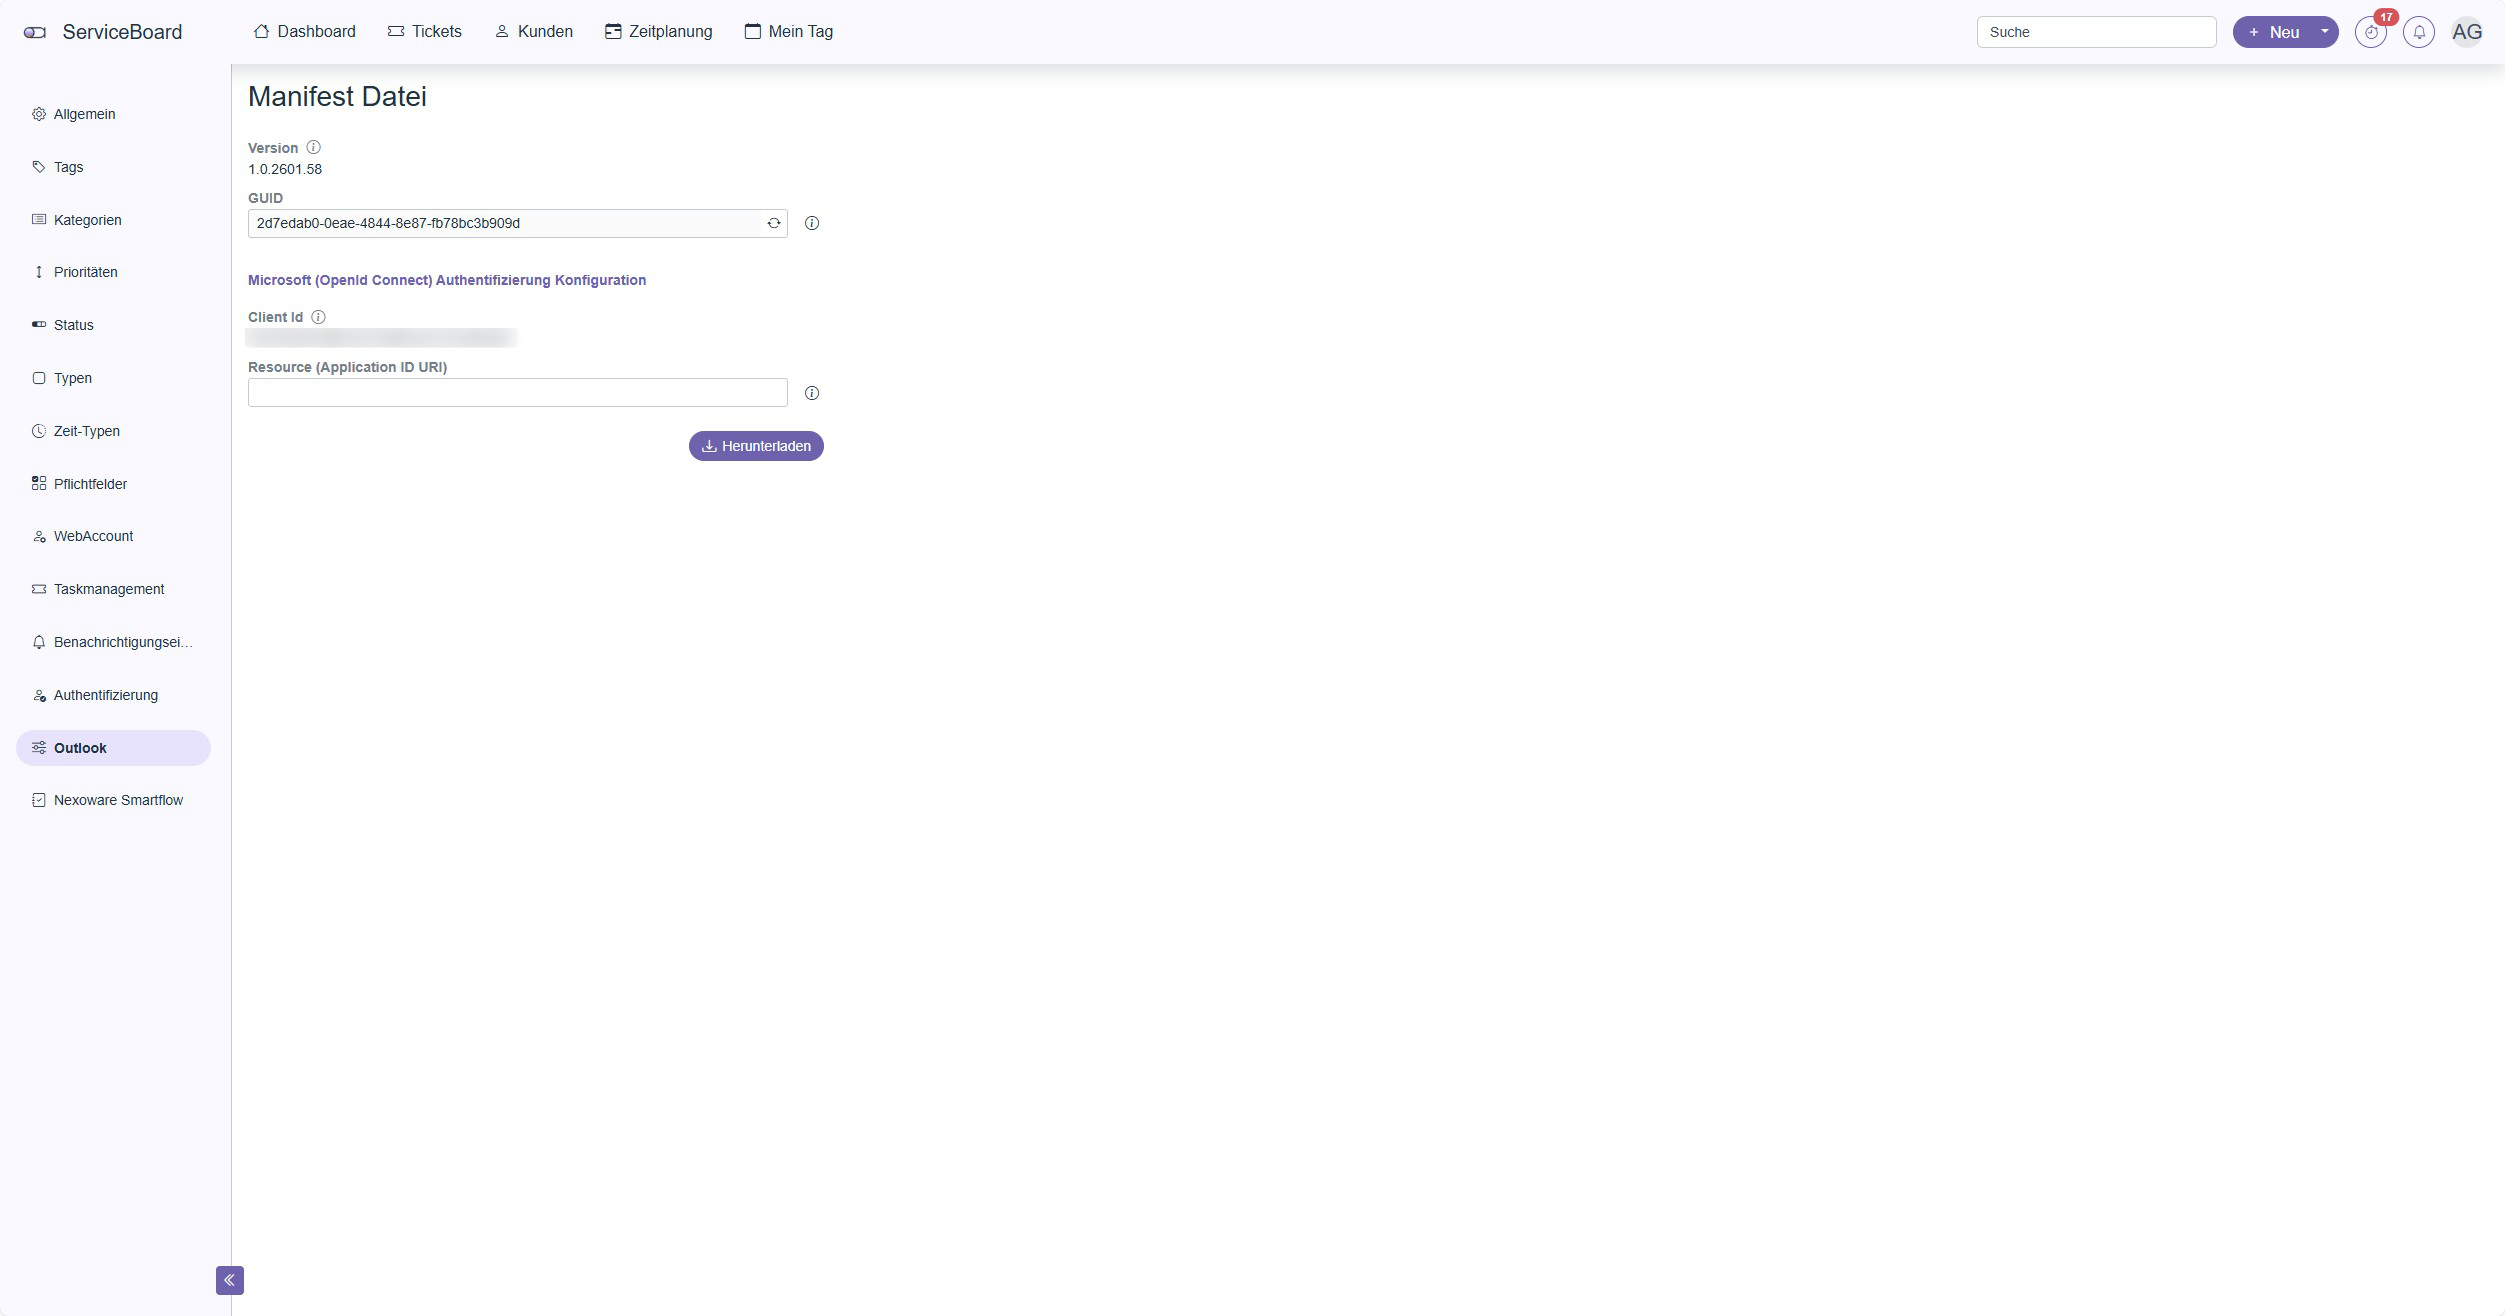
Generating the manifest file
Sign up at ServiceBoard and navigate to
Settings → Outlook
(Path: ServiceBoard → Settings → Outlook)
Enter your Application ID URI and then click on Download,
to the manifest file to download.
Then proceed to the next step: “Installation in the Microsoft Admin Portal”,
to add the manifest file and install the add-in for your organization.
If you don't have a ServiceBoard Nexus license, you can also generate the manifest file directly via URL.
To access the manifest generation page manually, log in to ServiceBoard Nexus using your c-entron account.
Since you don't have a license, you'll see a blank page.
Next, enter the following URL directly into your browser:
https://<nexus-server-url>/settings/generate-addin-manifest/
You'll receive the manifest file as a download and can then continue
Installation in the Microsoft Admin Portal
Sign up at Microsoft 365 Admin Center To:
https://admin.microsoft.com/
Go to Settings → Built-in Apps.
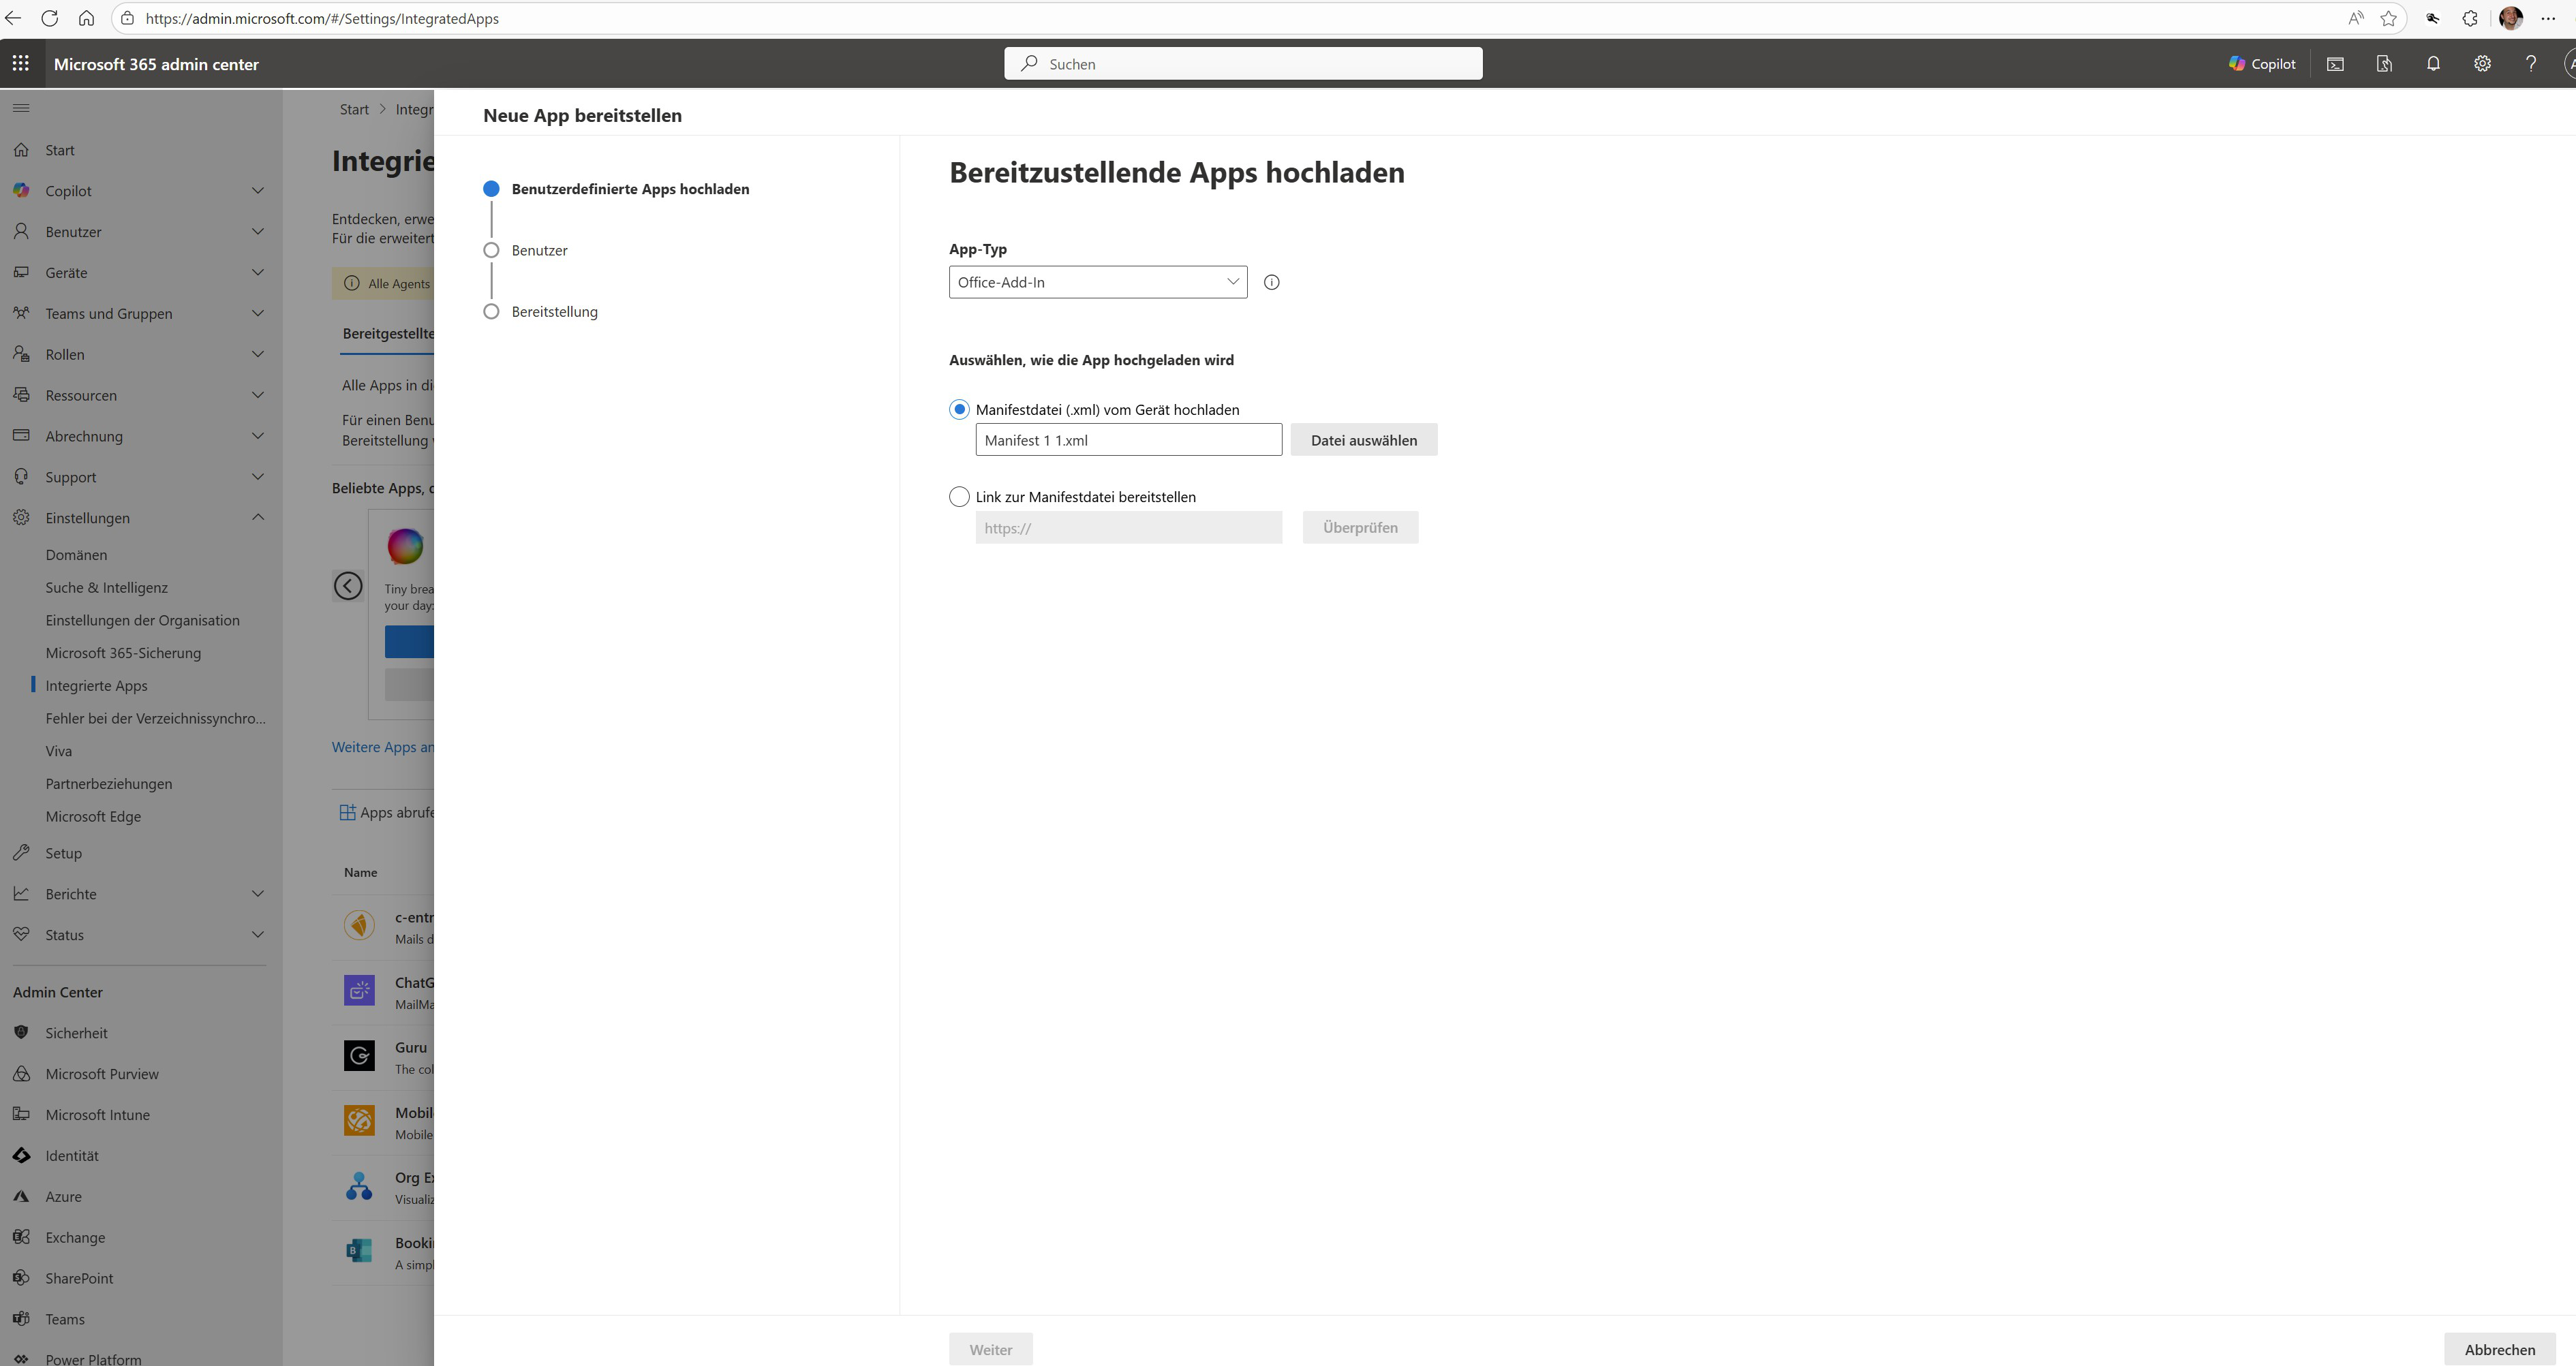
Click on Upload custom appsto begin uploading the add-in manifest file.
Upload custom apps
Select "Office Add-In" as the app type
Select file: Select the downloaded manifest file and click Next.
User selection
Select whether you want to install the add-in just for yourself, for the entire organization, or for specific user groups.
Provision
Check the requested App Permissions and Features carefully.
If everything is correct, click Accept permissionsto continue.
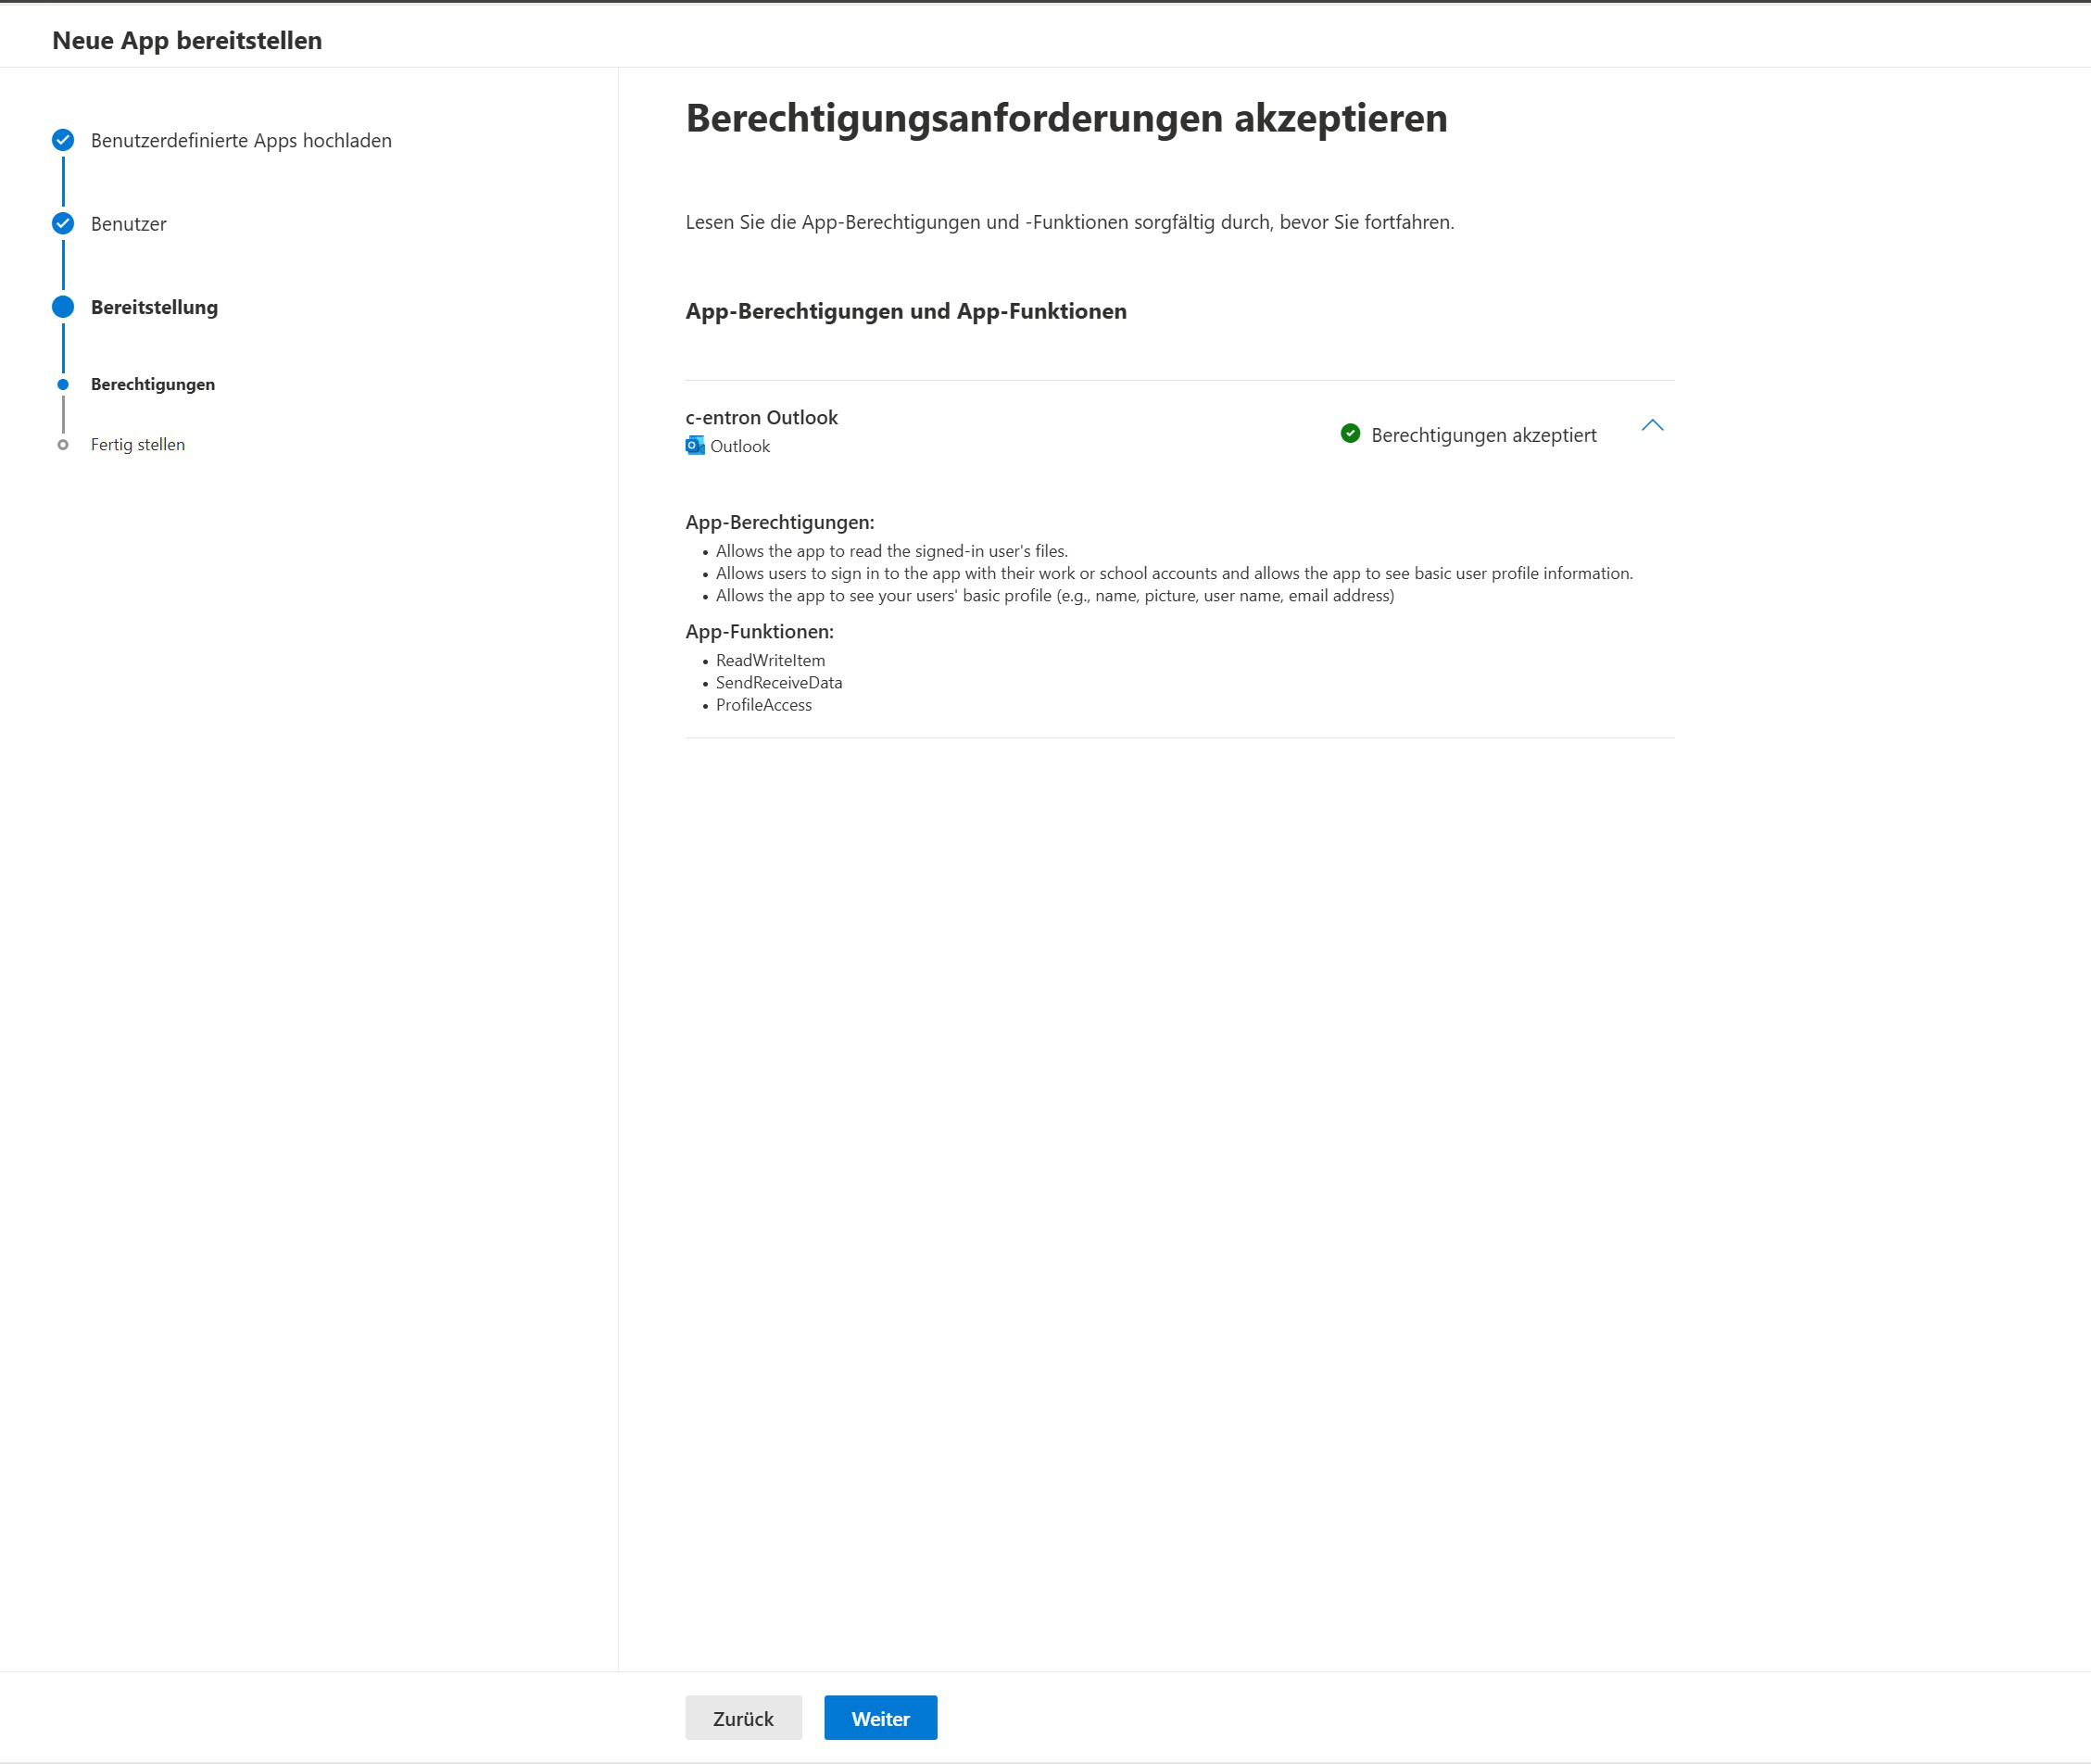
Permissions
Check the required permissions and features. If they are correct, click "Accept Permissions."
Once the permissions have been confirmed, the app will be registered.
This page displays the app permissions and features that are supported.
Finish
Click "Complete Deployment." The add-in will now be installed and will appear in the list of built-in apps in 15–45 minutes.